2D view window menu
The options for individual cameras are presented in the 2D view window menu, which is opened by right-clicking in a 2D view. It can also be opened on the View menu. The available options depend on if QTM is in RT/preview or File mode.
The below options are available for Qualisys cameras. For external video cameras (DV/webcam), additional options are available, see chapter External video devices in 2D view.
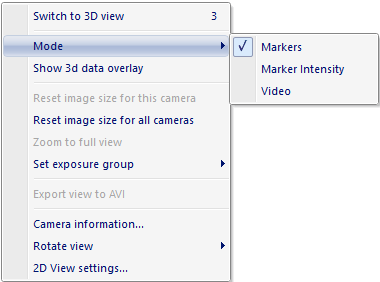
The following options are available in the 2D view:
-
Switch to 3D view
Switch the View window to 3D view.
-
Mode (Preview mode)
For a description of the different camera modes see chapter Video preview in QTM.
This option is only available when QTM is in preview mode before you start a capture.
-
Markers
Switch to the default Markers mode.
-
Marker intensity
Switch to the Marker intensity mode.
-
Video
Switch to the Video mode.
-
-
Show 3D data overlay
Overlay the 3D data on the 2D view. This can be done on any camera independent of whether it is Marker or Video mode. For more information see chapter 3D data overlay.
-
Reset image size for this camera (Preview mode)
Reset to full image size for a camera with reduced image size.
-
Reset image size for all cameras (Preview mode)
Reset all cameras to full image size.
-
Zoom to full view
Reset the zoom so that the whole image is shown for the camera. This is the same as double-clicking on the miniature in the top right corner.
-
-
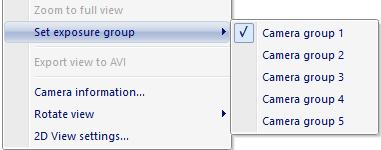
Set exposure group
Select the exposure group for the camera view that you right-clicked on, see chapter Delayed exposure to reduce reflections from other cameras.
The option is only available when the Exposure delay mode called Camera groups is selected on the Cameras page in Project options,
-
Export view to AVI
Export the camera view that you right-clicked on to an AVI file, see chapter Export to AVI file.
-
-
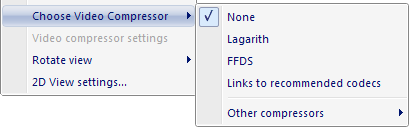
Choose video compressor (Preview mode)
Choose a video codec from a list of the installed codecs on the computer. The compressor is selected for all cameras in Video mode. For more information see chapter Video compression.
-
Video compressor settings (Preview mode)
Open the video compressor settings for the currently selected codec of the camera.
-
Camera information (Preview mode)
Show the camera information in a dialog, i.e. Camera type, IP address, etc.
-
Review camera settings (File mode)
Show the settings used for the camera in the current file, for more information see chapter Review camera settings.
-
-
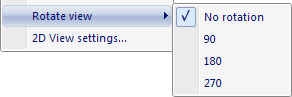
Rotate view
Change the rotation of the displayed 2D view so that it matches the camera rotation. For example if the camera is placed upside down you can use the 180 degree rotation.
-
The rotation is stored with the file, so you can rotate the cameras after you have calibrated the camera system. The 2D view rotations will then be stored in the QTM file. It is also possible to rotate the 2D views in a QTM file, but to save it you must make sure to make another modification to the file as well.
To change multiple cameras at the same time you can use the 2D view rotation setting on the Cameras page in Project options.
-
2D View settings...
Open the 2D view settings page in the Project options dialog so that you can change the 2D view settings, for example the 3D overlay settings. For more information see chapter 2D view settings.