External video devices in 2D view
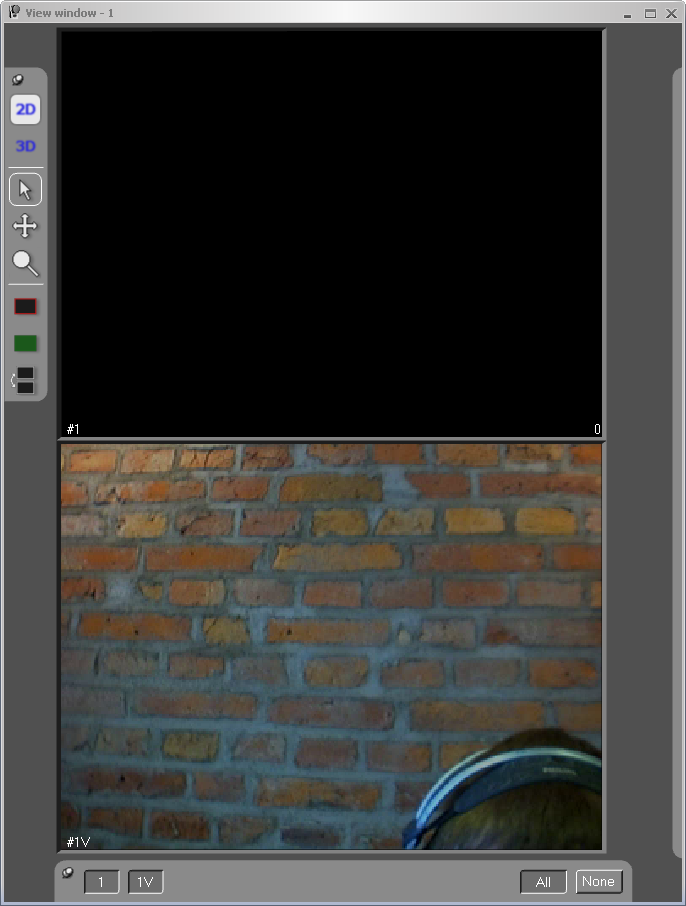
The external video devices, such as video from Blackmagic cards or web cameras, are displayed last in the 2D view window. The video data can be used for documentation purposes, but it is not used in the calculation of trajectories.
You need to save a default capture and file layout with
a 2D view window to see the video automatically during the capture and
in the file. To open a 2D view window with only the video cameras activated
you can click on the Video button
![]() .
Place the windows as you want them and then save the layout on the Window menu.
.
Place the windows as you want them and then save the layout on the Window menu.
You can have one video camera per 2D view window if you like. Use the camera buttons at the bottom of the 2D view window to select which cameras to view.
In preview mode the picture is the current view of the web camera. In file mode the picture is taken from the saved video file and it shows the video frame that corresponds to the capture frame. The video probably has fewer frames than the motion capture and therefore the numbers will not be the same. For information on how to record a video file see chapter How to use external video devices.
In file mode the current frame number and time is displayed in the upper left corner, e.g. Frame: 10 and Time: 0.1 s. This is probably not the same frame as the motion capture frame. The time does not have to be the same as the measurement time either, if the video offset has been changed, because the time that is displayed is the time from the start of the video file.
The settings for the video cameras are presented in the View window menu, which is opened by right-clicking on a video camera in the 2D view window. It is important to notice that the settings are individual per video camera so that you have to right-click in all of the video cameras if you want to change settings on several video cameras.
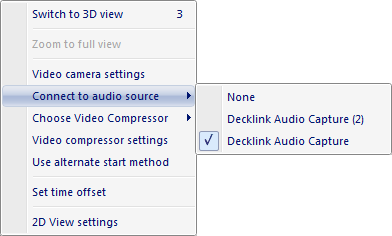
The following options are different from the options on the regular 2D view window menu. The available options depend on if QTM is in RT/preview or File mode.
-
Video camera settings (Preview mode)
These settings are specific for each type of video camera. For more information,see How to use external video devices or the manual of the camera for camera-specific information.
-
Connect to audio source (Preview mode)
Choose a DirectShow audio source that is associated with the video camera. For more information see chapter Selecting audio source.
-
Choose video compressor (Preview mode)
Choose a video codec from a list of the installed codecs on the computer. The compressor is selected individually per DV/webcam. For more information see chapter Compression of video from video cameras.
-
Video compressor settings (Preview mode)
Open the video compressor settings for the currently selected codec of the camera.
-
Use alternate start method (Preview mode)
Use this alternative if the video capture does not start or does not start at the correct time.
Only try this alternative if the default for some reason doesn't work.
-
Set time offset ...
Set the time offset between the video file and marker data, see chapter Video offset.
-
Remove this file link (File mode)
Delete this video file from the QTM file. The AVI-file will not be deleted only the link in the QTM file. A video file can also be imported with File/Import/Add link to video file.