Recalibration
An existing calibration can be recalibrated to improve it or solve problems, for example if a calibration failed. The following problems can be corrected:
-
Wrong calibration kit chosen
-
Wrong coordinate system orientation
-
Too low number of calibration frames
-
Incorrect positions of fixed cameras and reference markers
-
Incorrect linearization files
-
Incorrect calibration type
-
Deactivated cameras
Furthermore, it is possible to apply 2D processing to the calibration file before recalibration, for example excluding too small markers, or masking problematic areas with software masks, see chapter Processing 2D data. This may for example help to fix a failed calibration.
Follow these steps to recalibrate an existing calibration:
-
Open the calibration file of the wanted capture file. The calibration file is in the Calibrations folder in the project folder, see chapter Project folder.
The name of the calibration file, of the current capture file, is found on the Calibration page in the File reprocessing dialog . To open the dialog click the Reprocessing icon
 , when the wanted capture file is opened.
 -
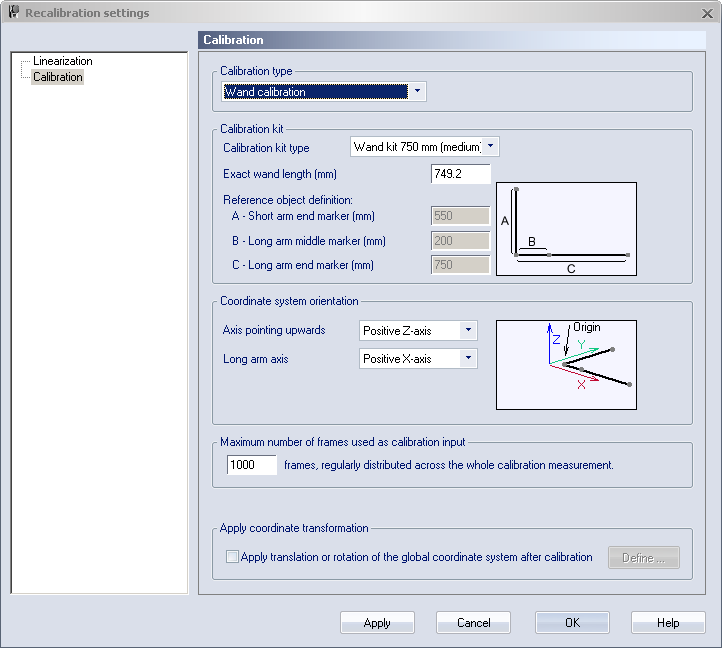
Click the Calibration icon
 to open the Recalibration settings
dialog.
to open the Recalibration settings
dialog. 
-
In the dialog the Calibration and Linearization settings can be changed, see chapter Calibration and chapter Linearization.
-
If a camera is deactivated on the Linearization page, that camera will not be used when a file is reprocessed with the calibration file. Activate the camera if you want it to be used in the measurements.
-
-
Click OK to start recalibration.
-
The Calibration results dialog is shown. Click Use if you want to use the reprocessed calibration as the current calibration. OK will only close the Calibration results dialog.
It is possible to Use a calibration that does not match the current camera system, because it enables you to reprocess files easier.
-
Save the calibration file and close the file.
All the capture files that have used this calibration must then be reprocessed, see chapter Reprocessing a file.