Marker masking
The marker masking is a tool to delete unwanted markers in the 2D data. The masking areas are defined per camera and can be drawn manually in the 2D view window, or created using the Auto mask function. The masks can also be viewed and managed on the Cameras page in the Project options dialog. For explanation of the settings, see chapter Marker masking.
Camera masks are applied during the measurement. The masked data is not transmitted to QTM, and it will not be possible to restore any masked markers.
If you want to apply masking post-hoc to a file, you can use software masks instead, see chapter How to use software marker masks.
How to use marker masking
Follow these steps to add a masking area to a camera.
-
Open a new file by clicking the New file icon
 .
. -
Open a 2D view window so that you can see the 2D markers in preview.
-
View the cameras in either Marker or Marker intensity mode.
-
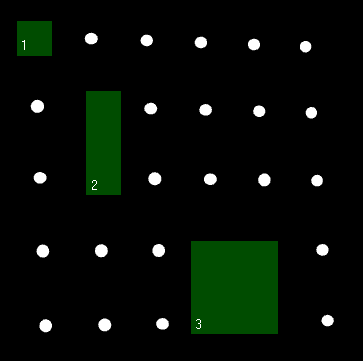
Select the Masker mask tool in the 2D view toolbar and draw a mask over the area with the unwanted marker. The mask is indicated as a dark green area on the 2D view of the camera.
-
The mask can be resized and moved by placing the cursor and hold down the mouse button on the edges of the mask respectively on the mask. To delete a mask or all masks for the current camera, right-click on it and select Delete this mask, Delete all masks or Delete all masks from all cameras.
Marker masks are not drawn linearized. To see the true positions of the masks, you need to turn off the Show linearized data option on the 2D view settings page, especially for wide-angle lenses.
-
-
Keep adding masks until all of the unwanted markers are covered. There can be up to 20 masks per camera for Arqus and Miqus cameras and 5 masks per Oqus camera.

How to use auto marker masking
The auto marker masking can be used to remove unwanted static reflections automatically. Follow this procedure to apply the auto marker masking.
-
Set up the camera system so that it covers the correct volume.
-
Check if you have any unwanted markers in the cameras. Before using auto marker masking try to remove the physical cause of the marker. Also try changing the Exposure and Marker threshold settings to remove the markers.
-
If the unwanted markers cannot be removed, make sure that you are in preview mode and then open a 2D view window.
-
Select the cameras where you want to add marker masking with the camera buttons. You can select all of the cameras or just some of the cameras.
-
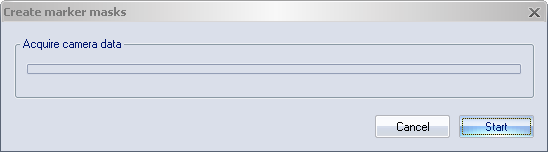
Click the Auto-create button on the Camera settings sidebar to open the Create marker masks dialog.

-
Click Start to get the position of the unwanted markers. The auto mask function will identify the largest reflection and mask them. If there are reflections close to each other, the auto mask function will try to join the masks.
-
If there already are masks on the camera you will have to choose whether to remove the old masks or not. Answer Yes if you want to remove them and add the new masks. Answer No if you want to keep the old masks and append the new ones to the list.
-
There can be up to 20 masks per camera for Arqus and Miqus cameras and 5 masks per Oqus camera. If there are more unwanted reflections you will need to manually edit the masks.
Marker masks are not drawn linearized. To see the true positions of the masks, you need to turn off the Show linearized data option on the 2D view settings page, especially for wide-angle lenses.
-
-
To see that the masks really cover a marker you can deselect the Enable marker masks checkbox. The masks will then be inactivated and the markers below will appear.