Wand calibration method
The Wand calibration method uses a calibration kit that consists of two parts: an L-shaped reference structure (L-frame) and a calibration wand. For a description of the available calibration kits, see chapter Qualisys calibration kits.
Place the L-frame so that the desired coordinate system of the motion capture is obtained. It is best if all cameras in the system can see all markers on the L-frame. If some cameras cannot see the reference structure, the Extended calibration method is used automatically, see chapter Extended calibration.
The calibration wand is moved inside the measurement volume in all three directions. This is to assure that all axes are properly scaled. The calibration algorithms will extract each camera's position and orientation by evaluating the camera's view of the wand during the calibration. For more information on how to move the wand, see chapter Calibration tips and How to move the wand.
It is possible to refine the calibration without the L-frame. This method can be used in situations where it is hard to place the L-frame. For more information see chapter Refine calibration.
The Advanced calibration is a wand calibration method that includes optimization of the linearization files of the cameras. For more information, see chapter Advanced calibration (beta).
Outline of how to calibrate (Wand calibration)
The steps below are just an outline of what should be done to calibrate the camera system with Wand calibration method.
Follow these steps to calibrate the camera system:
-
Switch on the camera system and start QTM.
-
Open a new file by clicking the New file icon
 .
. -
Place the L-frame in the measurement volume.
-
Set the settings on the Calibration page in the Project options dialog, see chapter Calibration.
-
Click OK.
-
Click the Calibration icon
 and set the settings in the Calibration
dialog, see chapter Calibration dialog.
 -
Click OK.
-
Move the calibration wand in the measurement volume.
-
Check the Calibration results and click OK.
If you have force plates there will be a warning reminding you of measuring the force plate position again. Since it has most probably changed some with the new calibration.
If any problems with the calibration process occur, check the settings on the Calibration page in the Project options. If that does not help, check the troubleshooting list in chapter Troubleshooting calibration.
Calibration tips
During the calibration, the wand is preferably moved in the measurement volume in a way that allows all cameras to see the wand in as many orientations as possible. This way the cameras will be properly calibrated in all directions.
To assure that all cameras can see the wand as much as possible during the calibration, make sure that the cameras are not blocked by the person moving the wand around in the measurement volume. This ensures that no camera will be blocked for a longer time period.
How to move the wand
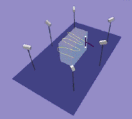
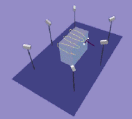
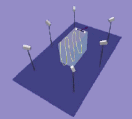
One suggestion on how to move the wand, is to move it in one direction at a time. Start by holding the wand positioned in the Z direction, i.e. the straight line between the two wand markers should be parallel to the Z axis. Move the wand in the entire measurement volume. It is important to fill the entire measurement volume with calibration points. Make sure that both the lower and upper parts of the volume are covered. Repeat the same procedure with the wand positioned in the X and Y direction. It is particularly important to collect points where there will be many markers during the motion capture.

|

|

|
In the pictures above the reference structure is not indicated to make the picture more distinct. The reference structure must of course always be present during the calibration. The box in the figure represents the measurement volume.
It is not necessary to hold the wand in distinct directions as described above, but the wand can be moved more freely as well. The most important is that the measurement volume is well covered and that the wand orientation is varied. The best moving method may vary depending on the application. It is recommended that the moving method is systematic and easy to repeat for consistent results.
Keep the movements of the wand smooth and controlled. Do NOT spin the wand at a high speed.