Trigno synchronization connections
For synchronization of the Trigno system with Qualisys the use of the Delsys Trigger Module is required. There are two synchronization options:
-
Use of the trigger button for synchronization, see chapter Trigno trigger connection. For this option, the use of a trigger button is required.
-
Use of Measurement Time for synchronization, see chapter Trigno Measurement Time connection. Use this option if you want to start a measurement without a trigger button.
For correct synchronization of the EMG data, it is very important to select the correct Input option corresponding to the used hardware connection in the Trigno QTM settings, see chapter Delsys Trigno QTM settings.
Using the wrong Input option in the QTM settings will lead to synchronization errors.
Trigno trigger connection
Follow these instructions to connect the trigger to the Trigno EMG.
-
Connect the Delsys Trigger Module to the Trigger port on the Trigno base station.

-
Put a BNC T-coupling on the Start Input BNC connector (green side of the module) so that you can also connect a trigger button to the input. The measurement must be started with the trigger button.
-
Connect the Start Input BNC connector to the trigger input of the camera system.
-
When using the Camera Sync Unit, use the Trig NO input on the Camera Sync Unit.
The Trig NC input on the Camera Sync Unit cannot be used with the Qualisys trigger button.
-
When using an Oqus camera for synchronization, use the Trig in connector on the control port splitter cable.
-
-
Make sure that you select the correct starting edge with the Start Input Edge selector on the module. The default setting is falling edge for the trigger signal on an Oqus system.
The green LED on the trigger button of the Trigger module lights up when the trigger signal arrives.
In QTM, make sure the synchronization settings are correct.
-
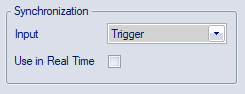
Under Project Options go to Input Devices > EMGs> Delsys Trigno. Set Input to Trigger.
-
Open the Synchronization page in the Project Options and manage the Trigger port(s) settings, see chapter Trigger ports.
-
For Oqus, set Function to Start capture and make sure that TTL signal edge is set to Negative.
-
When using a Camera Sync Unit, set Trig NO: Function to Start capture and make sure that Trig NO: TTL signal edge is set to Negative.
-
Trigno Measurement Time connection
Follow these instructions to set up the hardware for synchronization of the Trigno system using Measurement Time.
-
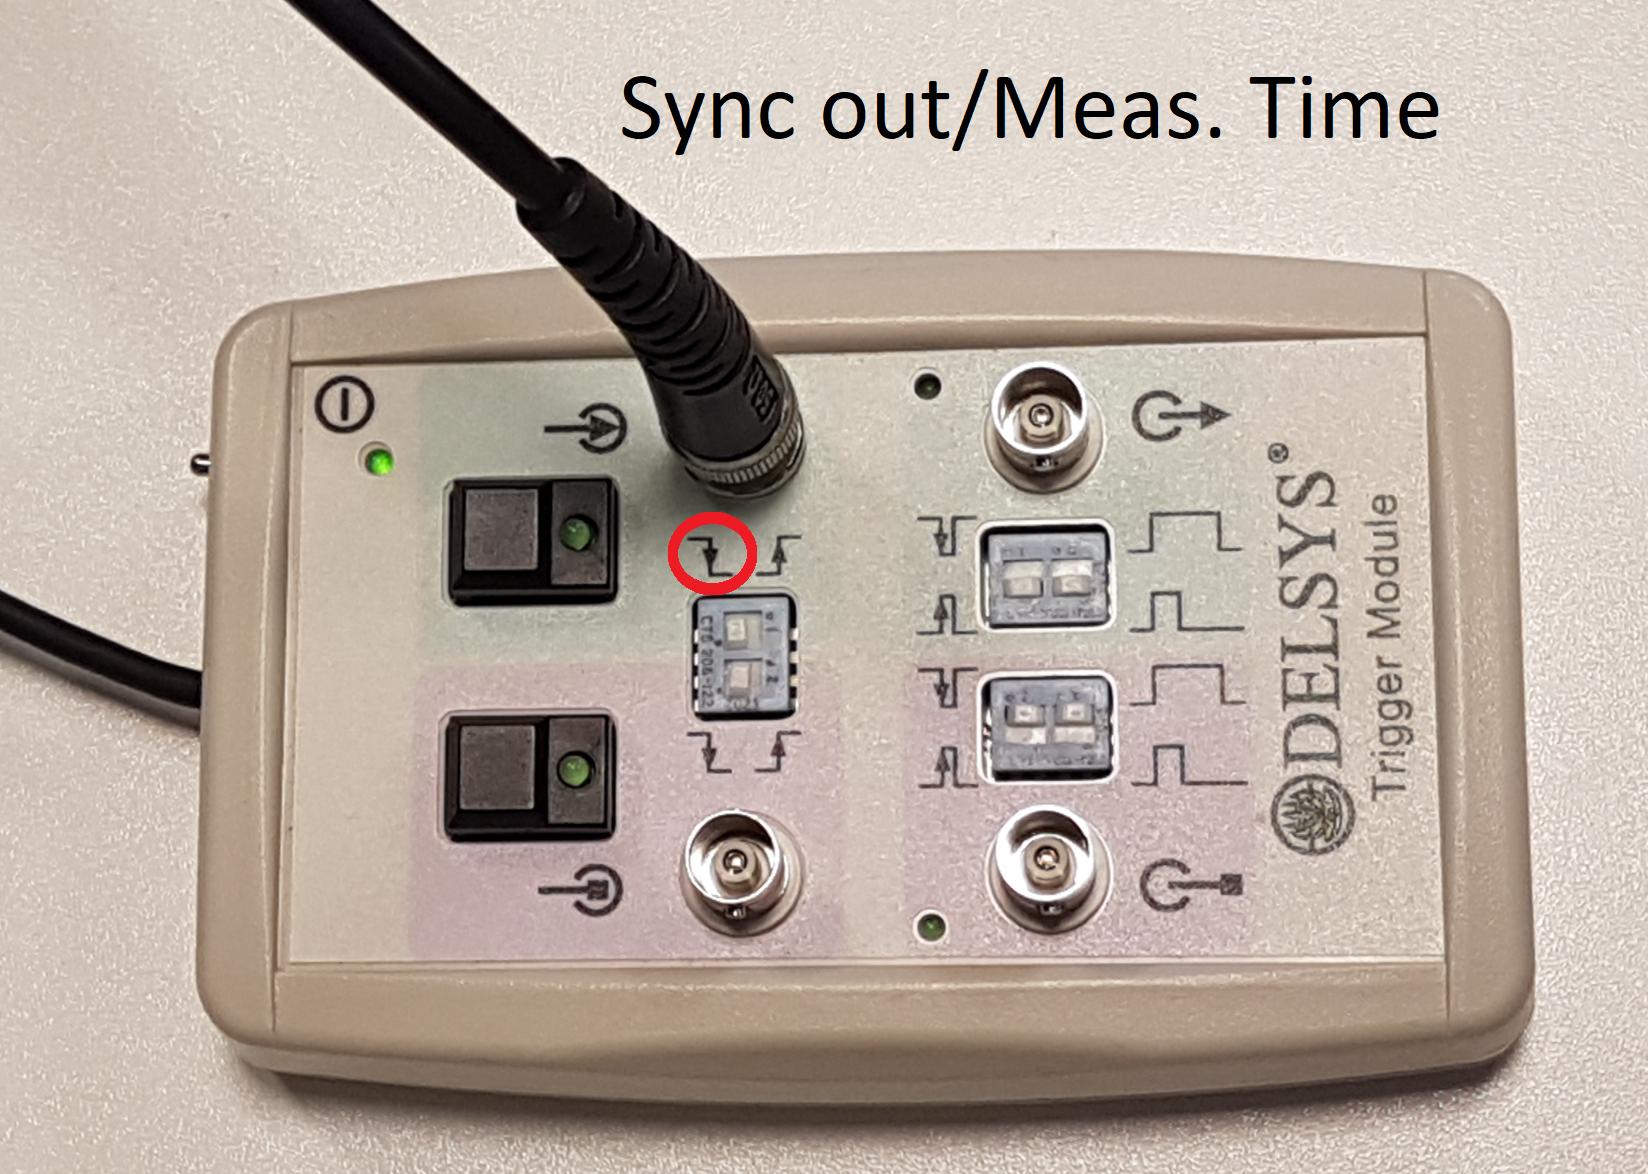
Connect the Delsys Trigger Module to the Trigger port on the Trigno base station.
-
Connect the Start Input BNC connector (green side of the Delsys Trigger Module) to the synchronization output of the Qualisys system.
-
When using a Camera Sync Unit, use the Meas. Time input on the Camera Sync Unit
-
When using an Oqus camera for synchronization, use the Sync out connector on the control port splitter cable.
-
-
Make sure that you select the correct starting edge with the Start Input Edge selector on the Delsys Trigger Module. The default setting in QTM is negative polarity, or falling edge.
The green LED on the trigger button of the Delsys Trigger Module lights up when the synchronization start signal arrives.
In QTM, make sure the synchronization settings are correct.
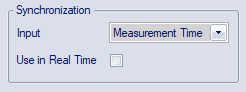
- Under Project Options go to Input Devices > EMGs> Delsys Trigno. Set Input to Measurement Time.
- Open the Synchronization page under Project Options.
- When using a Camera Sync Unit, make sure that under Measurement time the TTL signal polarity is set to Negative, see chapter Measurement time (Camera Sync Unit).
- When using an Oqus camera for synchronization, select the camera to which the splitter cable is connected. Under Synchronization Output set Mode to Measurement time, and make sure that TTL signal polarity is set to Negative, see chapter Synchronization output.