Setting up the Traqrs for VR skeleton tracking
To get started with VR skeleton tracking using the Traqr VR Marker Set, you will first need to configure your Traqrs and set them up in your QTM settings.
For setting up your Traqrs, follow these steps:
-
Traqr configuration
When using the Active Traqr make sure that the all markers have a unique marker ID. Use the Traqr Configuration Tool to change the configuration of the Traqrs if needed.
-
Definition of the rigid bodies
Create a rigid body definition for each Traqr. The easiest way to do this is to attach a set of 6 Traqrs to a person and do a short T-pose capture. Then, for each Traqr, select the markers in the 3D view window and press F8 to create a new rigid body and add it to the project. The rigid bodies should be named according to the naming conventions described in the Traqr VR Marker Guide, for example, Player1_Head for the Traqr attached to the head of Player1. The prefix before the first underscore, here Player1, will be the name of the associated skeleton. For more information about creating rigid bodies, see chapter Creating 6DOF bodies.
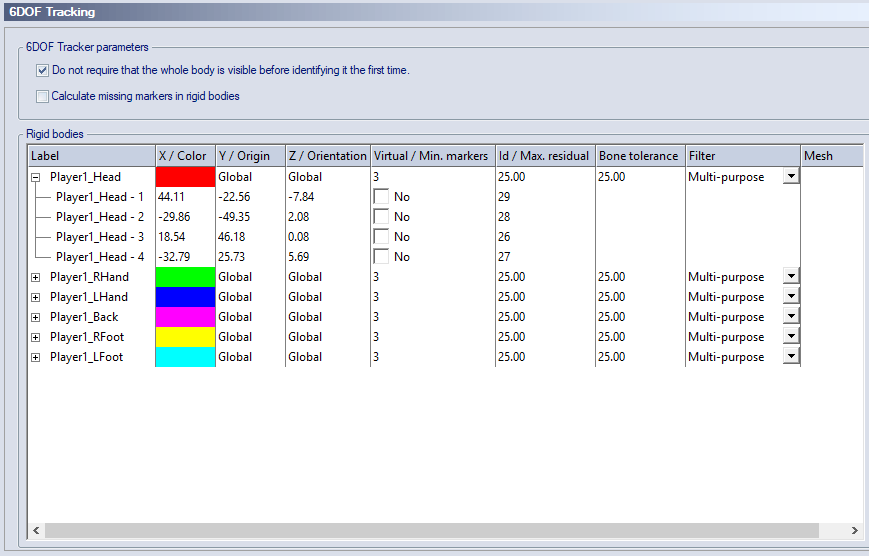
After defining the rigid bodies, check the definitions on the 6DOF Tracking page under Project Options. Make sure that the rigid bodies are correctly named and that the marker IDs are correct when using the Active Traqr.
When you are using a backpack or HMD to track the back or the head, you will need to translate the origin of the rigid body to the correct position (forward so it is placed on the back or top of the head) using the Translate dialog. The default location of the origin is the geometric center of the markers. For the translation it is easiest if the rigid body orientations are aligned with the person in T-pose. This can be achieved by having the person stand aligned with the global axes during the capture used to define the rigid bodies, or afterwards by using the Reset Rotation button on the 6DOF Tracking page while in preview.
Optionally, configure the other rigid body settings. It is recommended to increase the Maximum residual and the Bone tolerance values, for example to 25 mm or higher, for maximizing fill rates of 6DOF data. You can also use filters for smoothing, which may lead to a better playing experience. See the picture below for an example of a typical 6DOF tracking set up for a single player.
-
Attach the Traqrs to the players
The Traqrs can be attached to the player using dedicated strap mounts. Make sure that the Traqrs are securely attached to the correct positions. When needed adjust the mounting straps so that they are not too loose.
You can use labels to avoid mixing up the Traqrs. However, make sure not to cover the IR eye when attaching a label to an Active Traqr.
-
Calibrate the skeleton
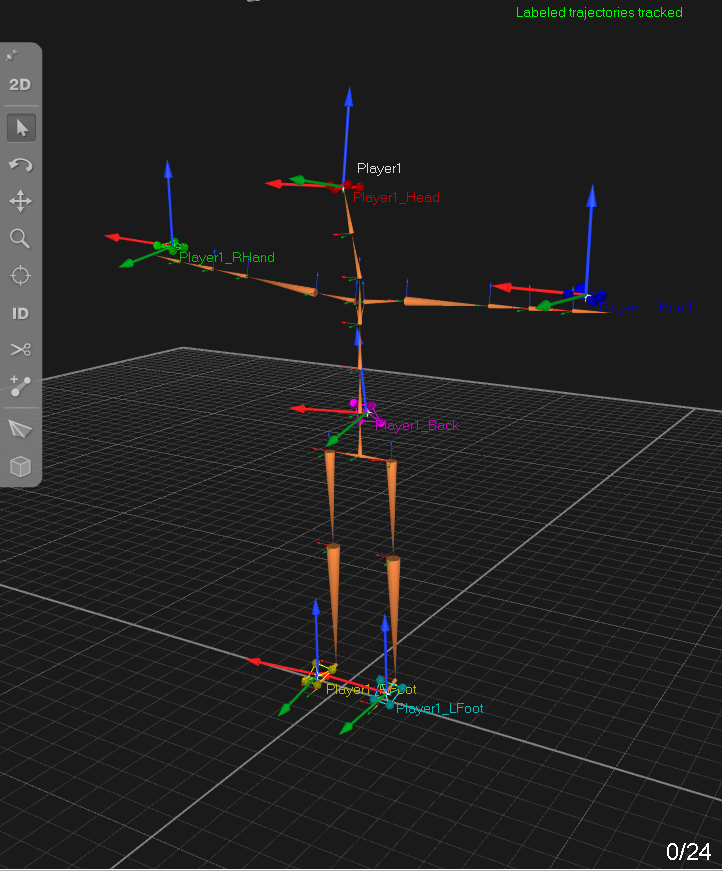
Start a new measurement (Ctrl+N) in QTM and calibrate the skeleton(s) while the player(s) are in T-pose. The skeleton definition will be added to the QTM project. When a skeleton definition with the same name is already present in QTM it will be updated. The alignment of the players or the rigid bodies during the calibration is not important since this will be taken into account by the calibration. The below figure shows a skeleton in the 3D view window after calibration.
Once the Traqrs have been defined as rigid bodies in the project, only step 3 and 4 are needed to prepare the player(s) for a session.