Batch processing
With batch processing, several capture files can be processed with the same settings. The same actions can be performed in batch processing as in the processing that is performed after a measurement has been captured.
If you only want to batch export files, you can also use the Batch Exporting dialog, see chapter Batch exporting.
To start a batch process, follow the steps below.
-
Click Batch process on the File menu. Select the files and click Open to open the Batch processing dialog.
-
Alternatively, select multiple files in the Project view, right-click on the selection, and click Batch process... in the context menu.
-
-
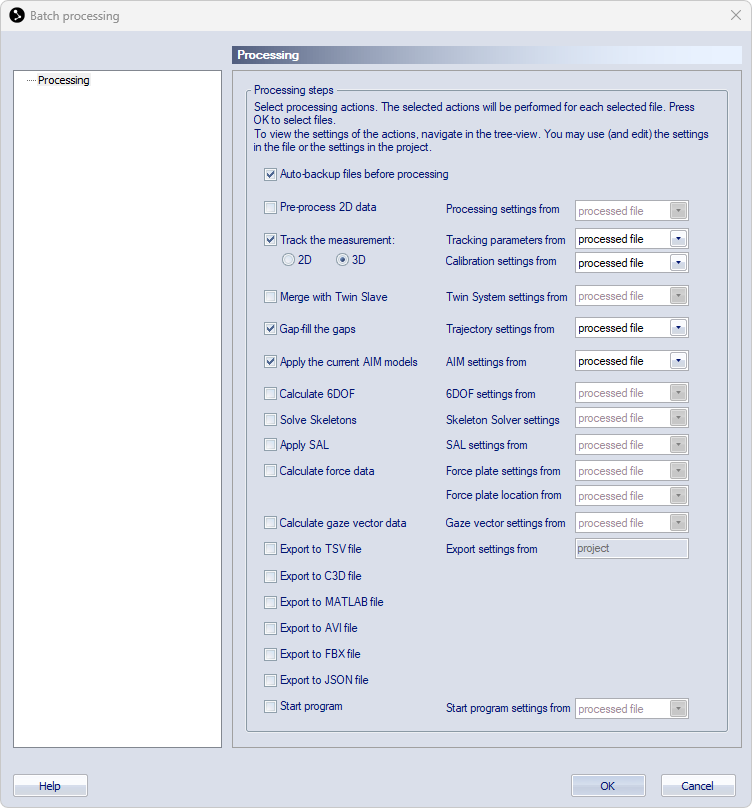
Select the processing steps that you want to perform from the list. The processing steps are the same as those that can be applied in post-processing, see chapter Processing.
-
Use the Auto backup files before processing if you want to keep a backup of the file. The files are saved in the same directory with the current date and time in the filename.
When Track the measurement with 3D or 2D is used, any previous labeling, editing or other processing actions applied to the existing trajectories will be undone. Any manual labeling or editing will be lost.
-
-
Choose the source for the settings from the drop-down lists to the right. For some settings the only possible source is the project, for the other settings there can be three possible options:
-
Processed file
The settings used are the ones present in each processed file and cannot be edited. This option is always selected by default because the other options replace the original settings from each file.
-
Project
The settings are copied from the current project settings to each processed file. The settings can be edited in the tree-view to the left. Editing the settings will change the current project settings as well. This option is often the best to use when you want to change the settings of the processed files.
-
Present file
The settings are copied from the present file (the file open in the QTM window where you opened the Batch processing dialog) and can be edited in the tree-view to the left.
-
Notes on settings source:
-
The Present file settings source is not available for the Pre-process 2D data and Track the measurement steps.
-
For the export steps, there is no choice for the settings source. They are always based on the current project settings.
-
The Track the measurement settings are split into Tracking parameters and Calibration settings so that the source can be set separately. Make sure that the calibration is correct when using the option project.
-
The Calculate force data settings are split into Force plate settings and Force plate location so that the source can be set separately.
-
If Merge with Twin Secondary is used with Project settings then the twin master file is automatically merged with a file with the same name and ending with _secondary that is located in the same folder.
-
-
-
Click OK. The actions are performed on the files and then the files are saved and closed.
Files are automatically saved when batch processing. Any changes cannot be reverted, unless you restore a backup.
Loading a saved calibration
If you want to batch reprocess files with a specific calibration, it is easiest to load it into the project.
The calibration can be loaded as follows:
-
Open the Current Calibration page under Project Options > Input Devices > Camera System > Calibration.
-
Click on Load other.
-
Select the calibration file (.qca) in the file dialog and open it. The file dialog opens by default in the Calibration folder of the project, but you can also browse for another folder.
When loading a saved calibration , the following data is loaded:
-
The calibration and its Transformation settings,
-
The camera system and the camera order,
If the current camera configuration differs, it is recommended to load a more recent calibration again before you start a new measurement.
-
The linearization files.
If there are newer linearizations stored in the camera, you will get a message when you start a new measurement.