AVI Export
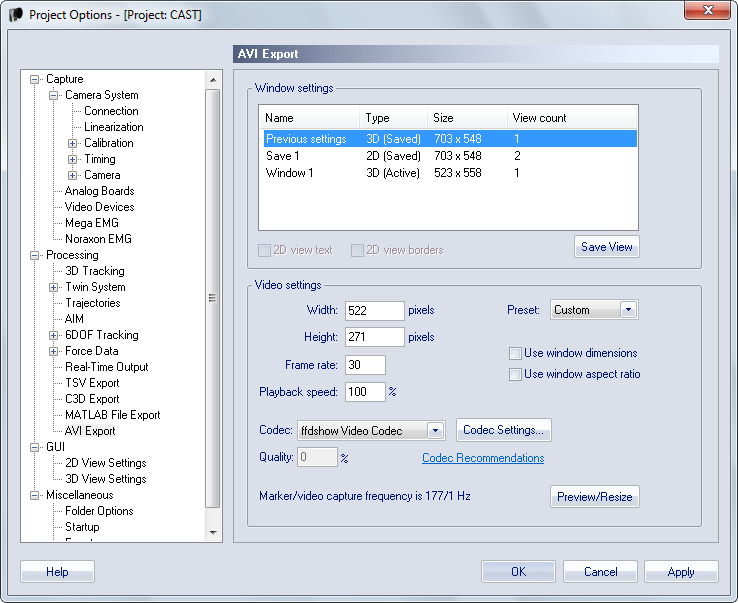
The AVI Export page contains settings for the export of 3D or 2D views to AVI files. The export can be done either as a processing step or manually from the File/Export menu. For more information see chapter Export to AVI file.
If you export an AVI file manually the current setting of the processing step will also change. Therefore it is recommended that you save the View that you want to use in a processing step so that you can return to that setting.
Window settings
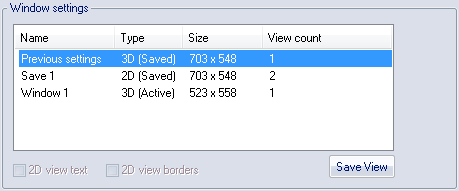
The Window settings control the input to the AVI file, i.e. the view that is used for the export. The settings consist of a list of active and saved views (3D or 2D). Select the view that you want to use in an export, then you set the output with the Video settings below. That view will then be saved as Previous settings in the list and used in the export until you select another view. It is important to notice that if you make an AVI export from the File menu, the new settings will be used in the export directly after a capture. Therefore it is recommended that you save any views with the Save View option, that you want to be able to use again.
The list has the following columns:
-
Name
The name of the view depends on whether it has been saved or not.
The active views, i.e. those views that are open in QTM, are called Window 1 and so on. Then there is a saved view with the last AVI export made by QTM, it is called Previous settings. The name of these two cannot be changed and you cannot delete the view from the list.
The views that you have saved with the Save View option can have any name. Double-click on the name to change it. The saved views can also be deleted by right-clicking on the view and select Delete.
-
Type
The type is either 3D or 2D. A 2D view that only displays video images are still a 2D type of view. Then the type can be either Active or Saved.
If you are saving an Oqus video to an AVI file, e.g. with a 3D overlay of, then the video image will be linearized. I.e. the same parameters that are used to correct the marker data is applied to the video data to correct for the lens distortion. Therefore the pixels will not match exactly with the original video image. The linearization can be turned of with the Show linearized data option on the 2D view settings page in Project options.
-
Size
The size is the x and y size of the view in pixels.
-
View count
The View count displays the number of cameras displayed in a 2D view. A number within parentheses means that there that number of views with a 3D overlay.
Below the list there are three options.
-
2D view text
The 2D view text option toggles whether the text, e.g. camera number, is displayed in the AVI export.
-
2D view borders
The 2D view borders option toggles whether the borders around a camera view is included in the AVI export.
-
Save View
The Save View option save the selected view so that you can use it later. The view is then copied and the type changed to Saved. The name can be changed directly in the Name column.
Video settings
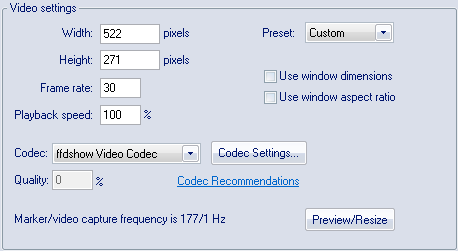
The Video settings control the output of the AVI export. The following options are available:
-
Width
The width of the video in number of pixels. The width can also be changed by resizing the Preview window.
The width can be larger than the display size.
-
Height
The height of the video in number of pixels. The height can also be changed by resizing the Preview window.
The height can be larger than the display size.
-
Frame rate
The frame rate in Hz of the video file. The rate is down-sampled if you use a frame rate lower than the marker or video capture in the view. I.e. if you enter 30 Hz and the file is captured at 120 Hz, then the video file will contain every fourth frame.
For just playback on a computer it is sufficient to use 30 Hz.
-
Playback speed
The Playback speed option controls the speed of the file in % of the original speed, so that the file can for example be played in slow motion. E.g. if you have a file captured at 120 Hz and a Frame rate for the AVI export of 30 Hz, then you can use a Playback speed of 25% to get all of the captured frames in the video file at a quarter of the original speed.
-
Preset
The Preset option is for using standard video output in the 16:9 format. The available presets are:
-
Custom
The Preset option is set to Custom as soon as any of the Video settings does not match the other three presets.
-
480p - 30 Hz
The video output is set to 480p at 30 Hz. This means a size of 854*480 pixels and using progressive scanning.
-
720p - 30 Hz
The video output is set to 720p at 30 Hz. This means a size of 1280*720 pixels and using progressive scanning.
-
1080p - 30 Hz
The video output is set to 1080p at 30 Hz. This means a size of 1920*1080 pixels and using progressive scanning.
-
-
Use window dimensions
The Use window dimensions setting makes the size of the video the same as the window that is selected in the Windows settings.
-
Use window aspect ratio
The Use window aspect ratio setting makes the ratio of width and height the same as the window that is selected in the Windows settings.
-
Codec
Use a codec to reduce the file size of the video. For information about recommended codecs, see chapter Recommended codecs.
There are two options for the codecs:
-
Codec settings
Click on Codec settings to open the settings for currently selected codec.
-
Quality
For some codecs you can set the Quality directly without opening the settings.
-
-
Preview
Display a preview of how the exported window will look like, showing the data of the current frame. The size of the video window can be changed by resizing the preview window. However, if the Use window dimensions setting is active then the size is locked.
-
Marker/Video frequency
The marker and video frequency of the current camera settings are displayed at the bottom of the page. The video frequency that is displayed is only the highest of the used frequencies.
If you are exporting an AVI file from a QTM file then the marker/video frequency displays the frequencies of that file.
The settings of the previous export are always saved, that means that if you change settings for an export from the File menu, those settings will also be used for an export directly after a file capture. The settings are not saved if you use the Export view to AVI option on the 3D and 2D view window menus.