Rigid body meshes
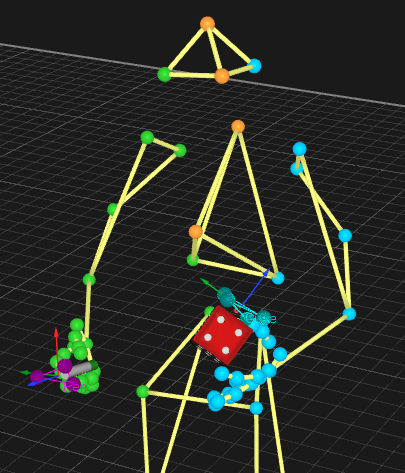
A rigid body mesh can be used to visualize the object tracked by a rigid body. QTM supports meshes in the format of the Wavefront 3D object (.obj ) files. To use a 3D mesh copy the .obj file and all of the related .mtl and texture files to the Meshes folder of the project. The mesh can be associated with a rigid body by the following two ways.
-
From 3D view window
Right-click in the 3D view and select Rigid Body -> Change Mesh of Rigid Body.
-
From Project Options
Double click on the Mesh column fro the rigid body on the 6DOF tracking page.
The Rigid Body Mesh Settings dialog is opened, see chapter Rigid body Mesh Settings dialog. Select the mesh file to use from the list and modify the settings. Use the Apply button to verify that it looks correct in the 3D view. It is often best to use trial and error to find the position and rotation for the mesh. Use these tips to position the mesh.
-
Use the Scale option to set the correct scale for a mesh.
-
Always scale the mesh first before translation and rotation, because the distance to the mesh coordinate system is changed when scaling.
Using really large meshes can slow down the rendering in QTM.
The Meshes folder can be set to any folder on the Folder options page in Project options. This means that the same meshes can be used by different projects.
Sharing a file with a rigid body mesh
When sharing a file with a rigid body mesh it is important to include the mesh files with the QTM file. This can be done in the following ways:
- Share the whole project.
- Share the QTM file and mesh files together. QTM will find the mesh files if they are located in the same folder as the QTM file. The other user can also copy the mesh files to the Meshes folder in their project.