Placing the L-frame
Before you start a calibration, make sure that your camera settings are optimized and that there are no unwanted reflections in QTM.
-
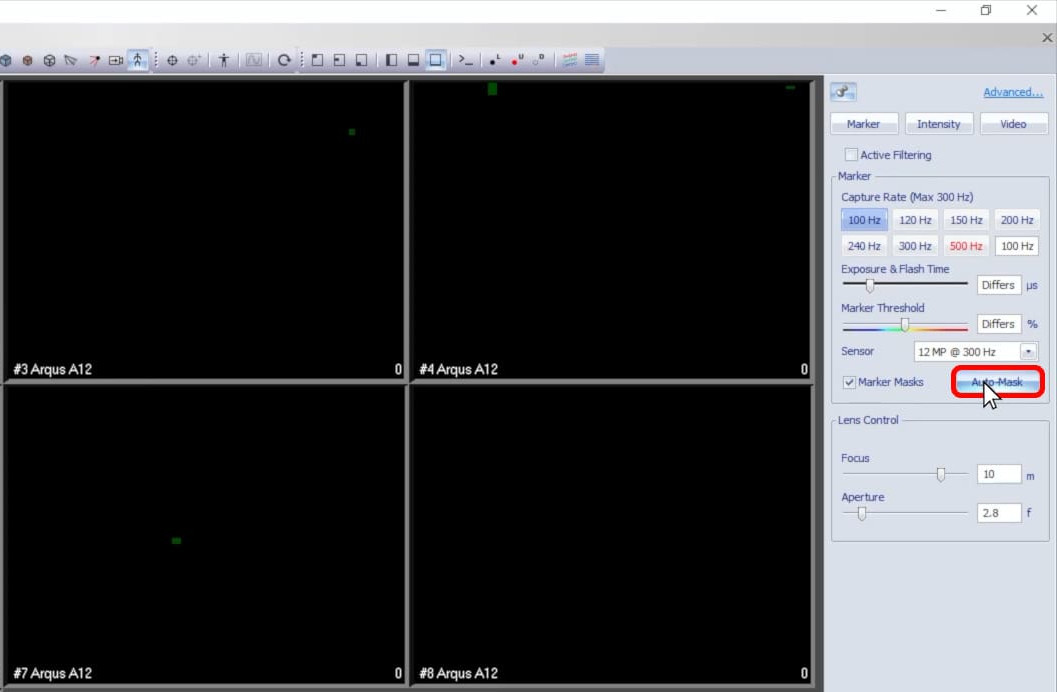
 Click the New icon in the top toolbar or type keyboard shortcut Ctrl+N to put the cameras into live preview mode.
 -
If the cameras are picking up any unwanted reflections, solve them through camera settings and masks.
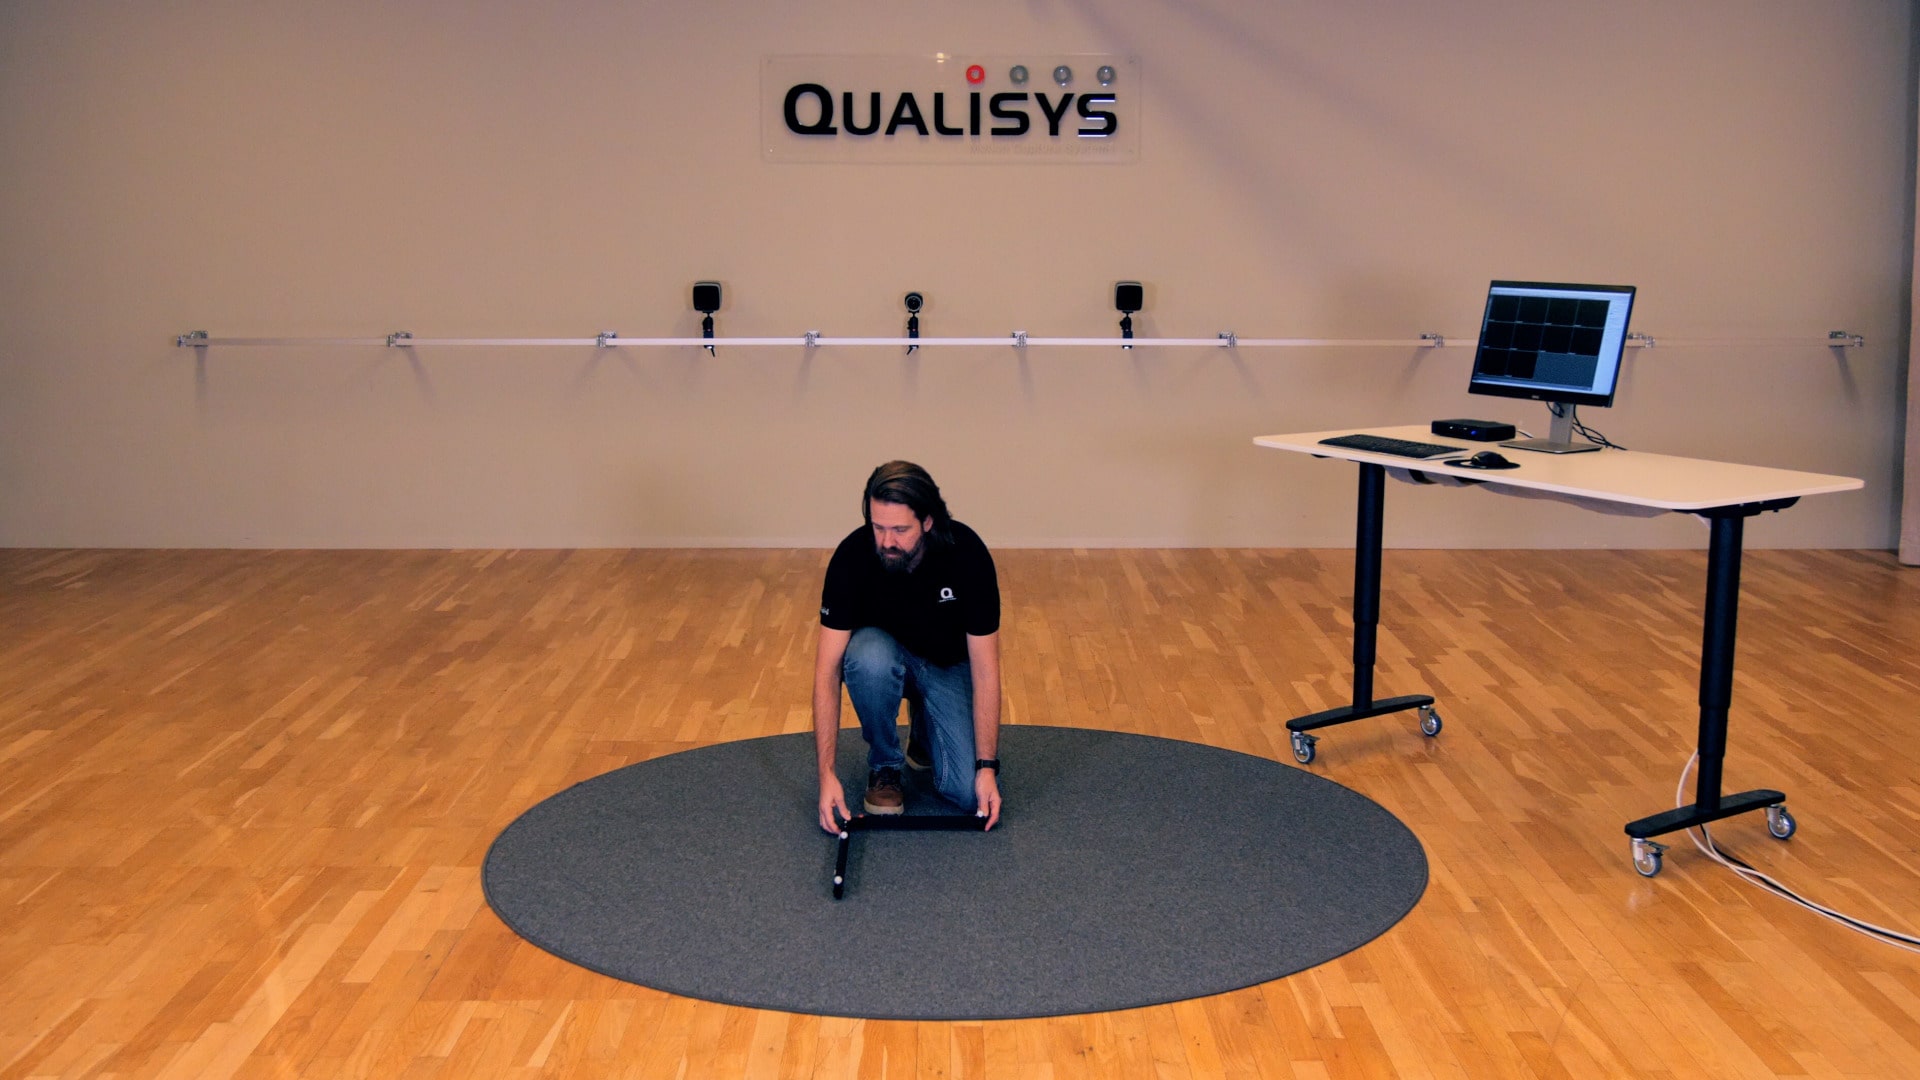
Once you’ve ensured that zero reflections are picked up by the cameras, place the L-frame in your recording volume. Remember that its corner marks the origin point of your lab’s coordinate system and its handles define the X and Y axes according to the orientation set in Project Options
-
It is recommended that the L-frame be placed where all of the cameras can see it. However, you can still calibrate as long as at least some of the cameras can see the L-frame and there is enough overlap between them. In this case, refer to the QTM user manual for more details on doing an extended calibration.
-
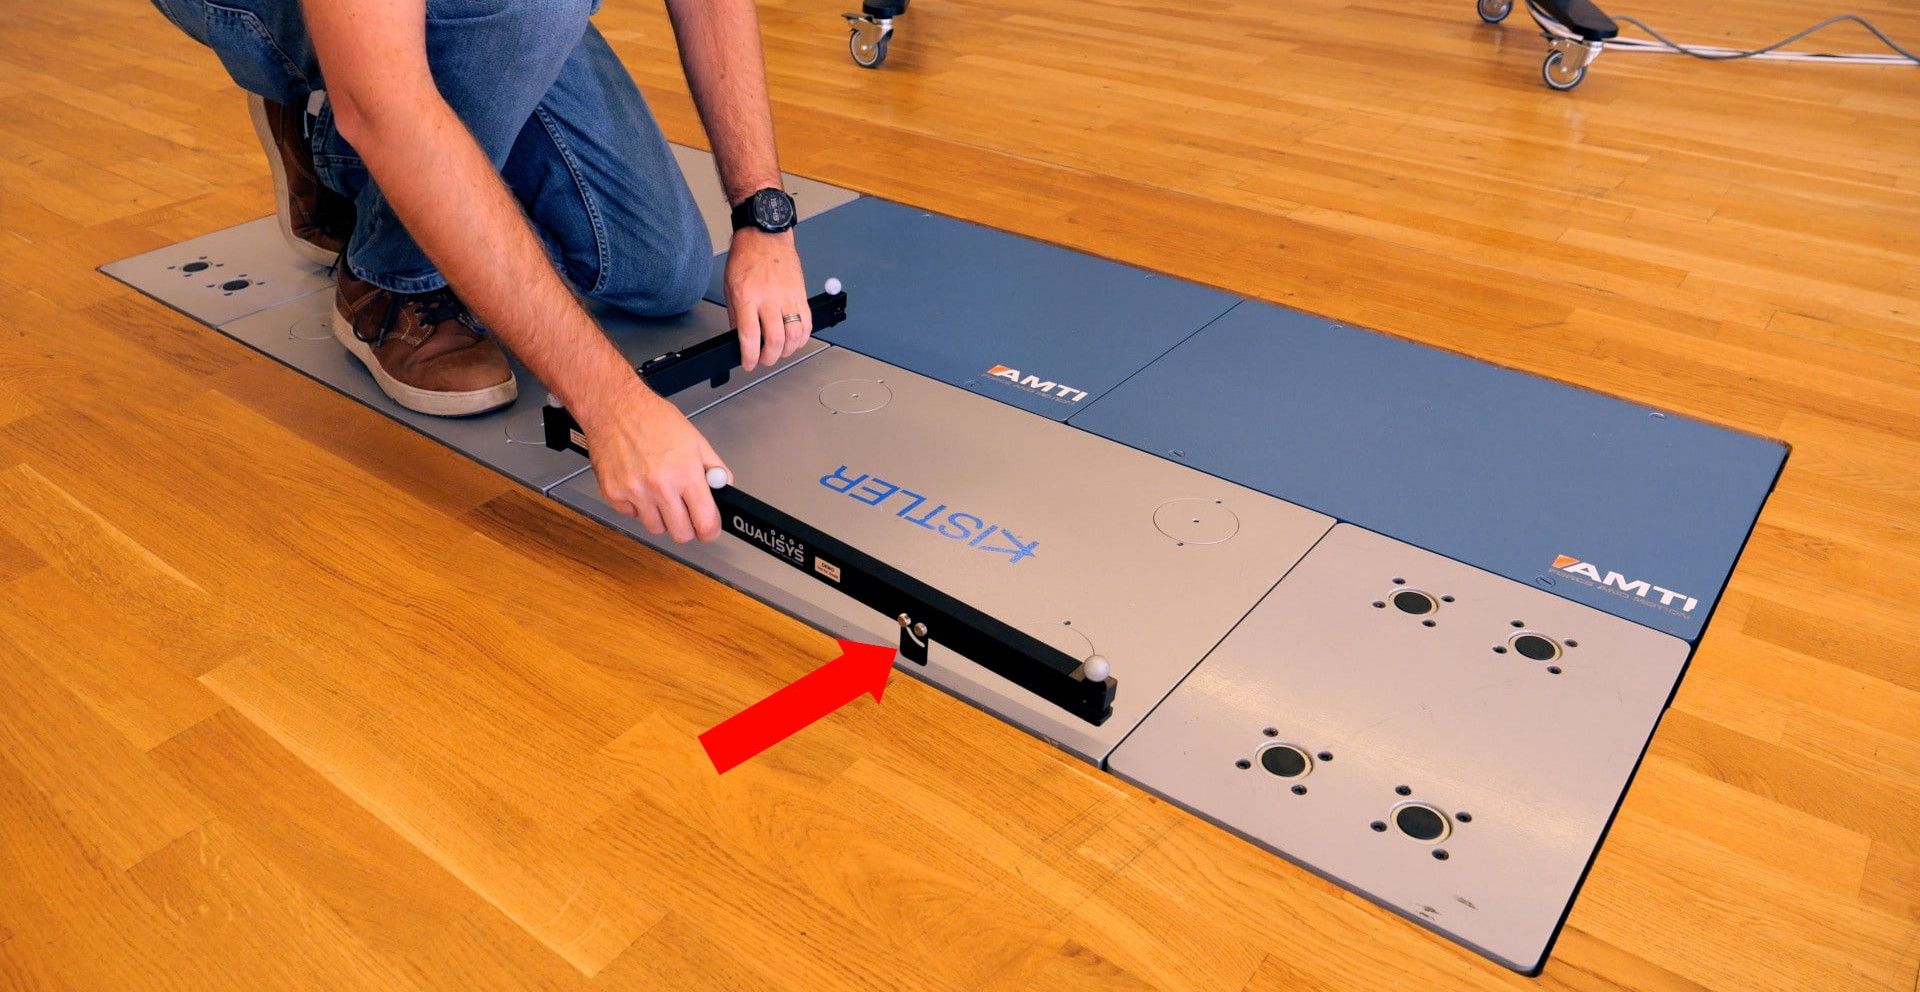
If your lab has force plates, the L-frame is usually placed on them in a predefined position. The foldable L-frame has tabs that can slide open to hold the frame in place along the plates.
-
Check the bubble indicators and turn the adjustment screws if needed to make sure that the L-frame is completely level.
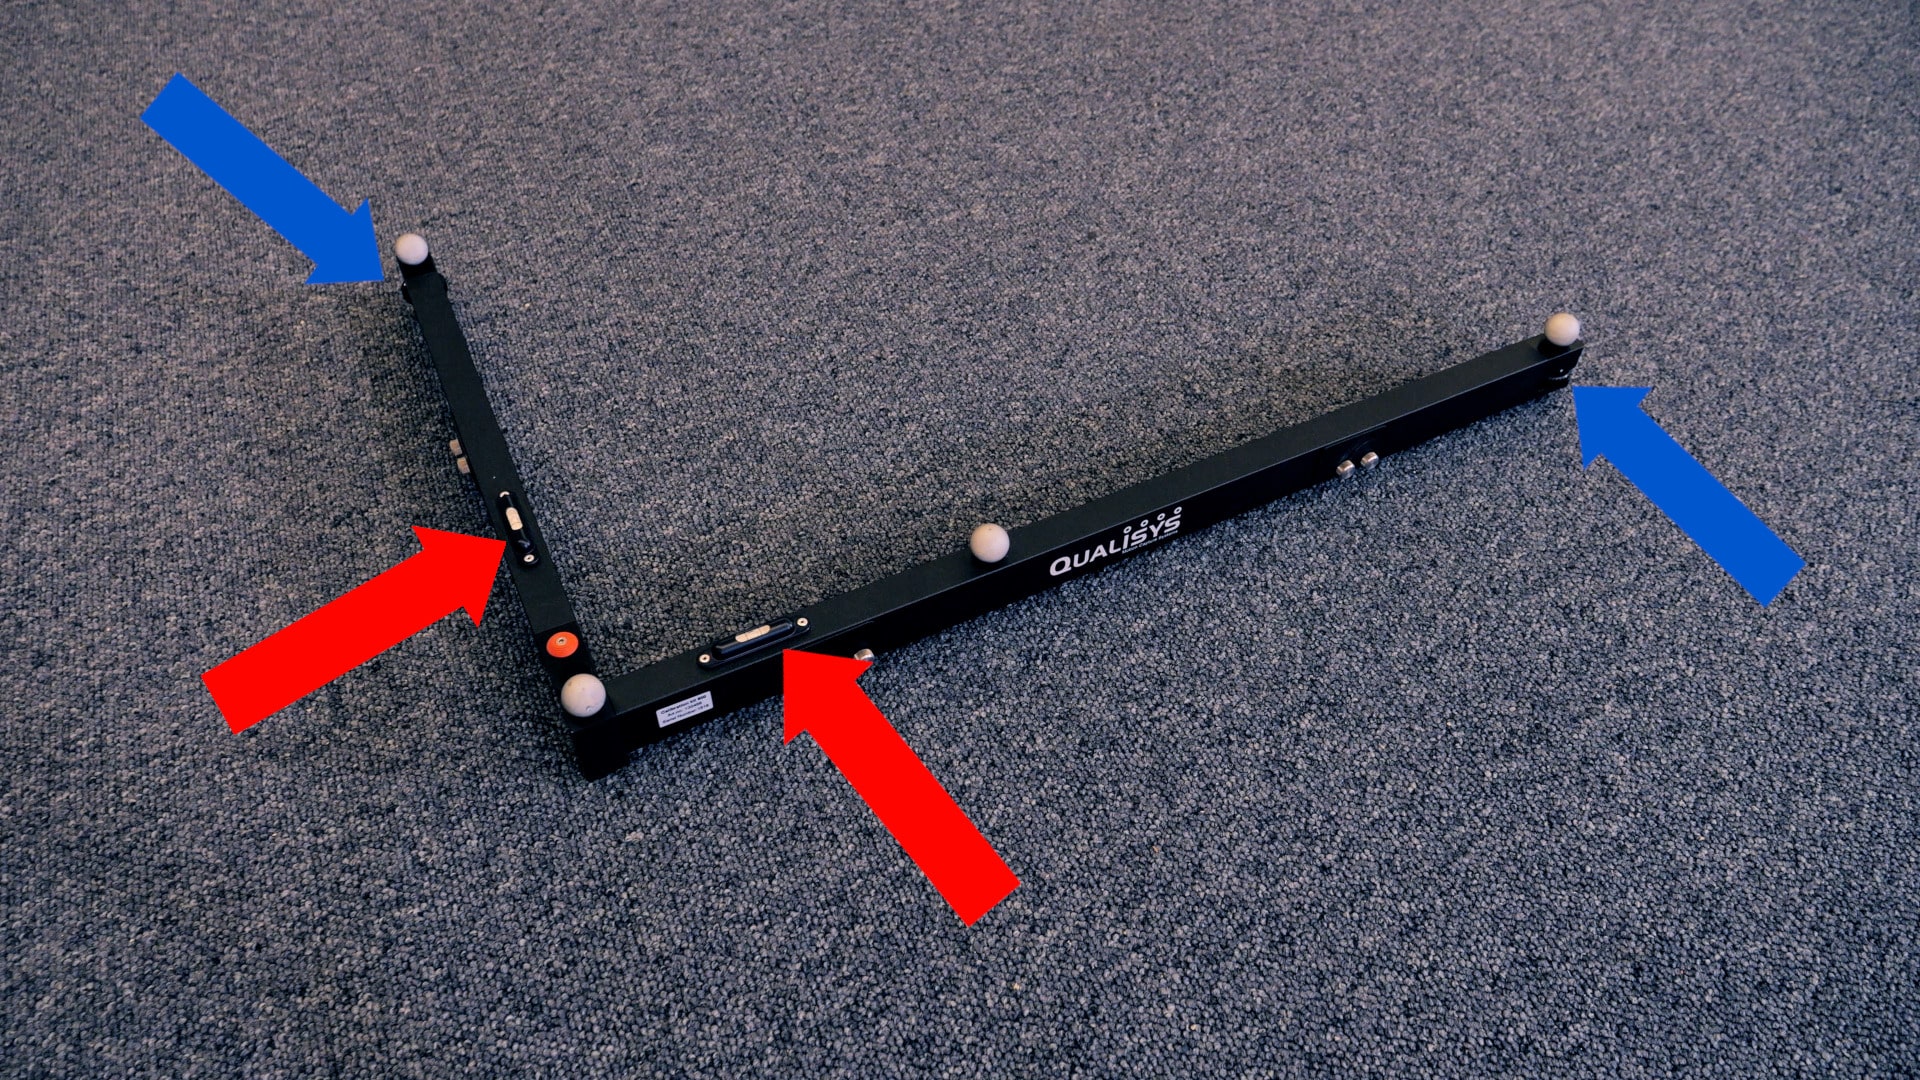
The L-frame will remain in place during the calibration.