How to export
You can manually export your current file, export a batch of files simultaneously, or set up exports as an automatic processing step.
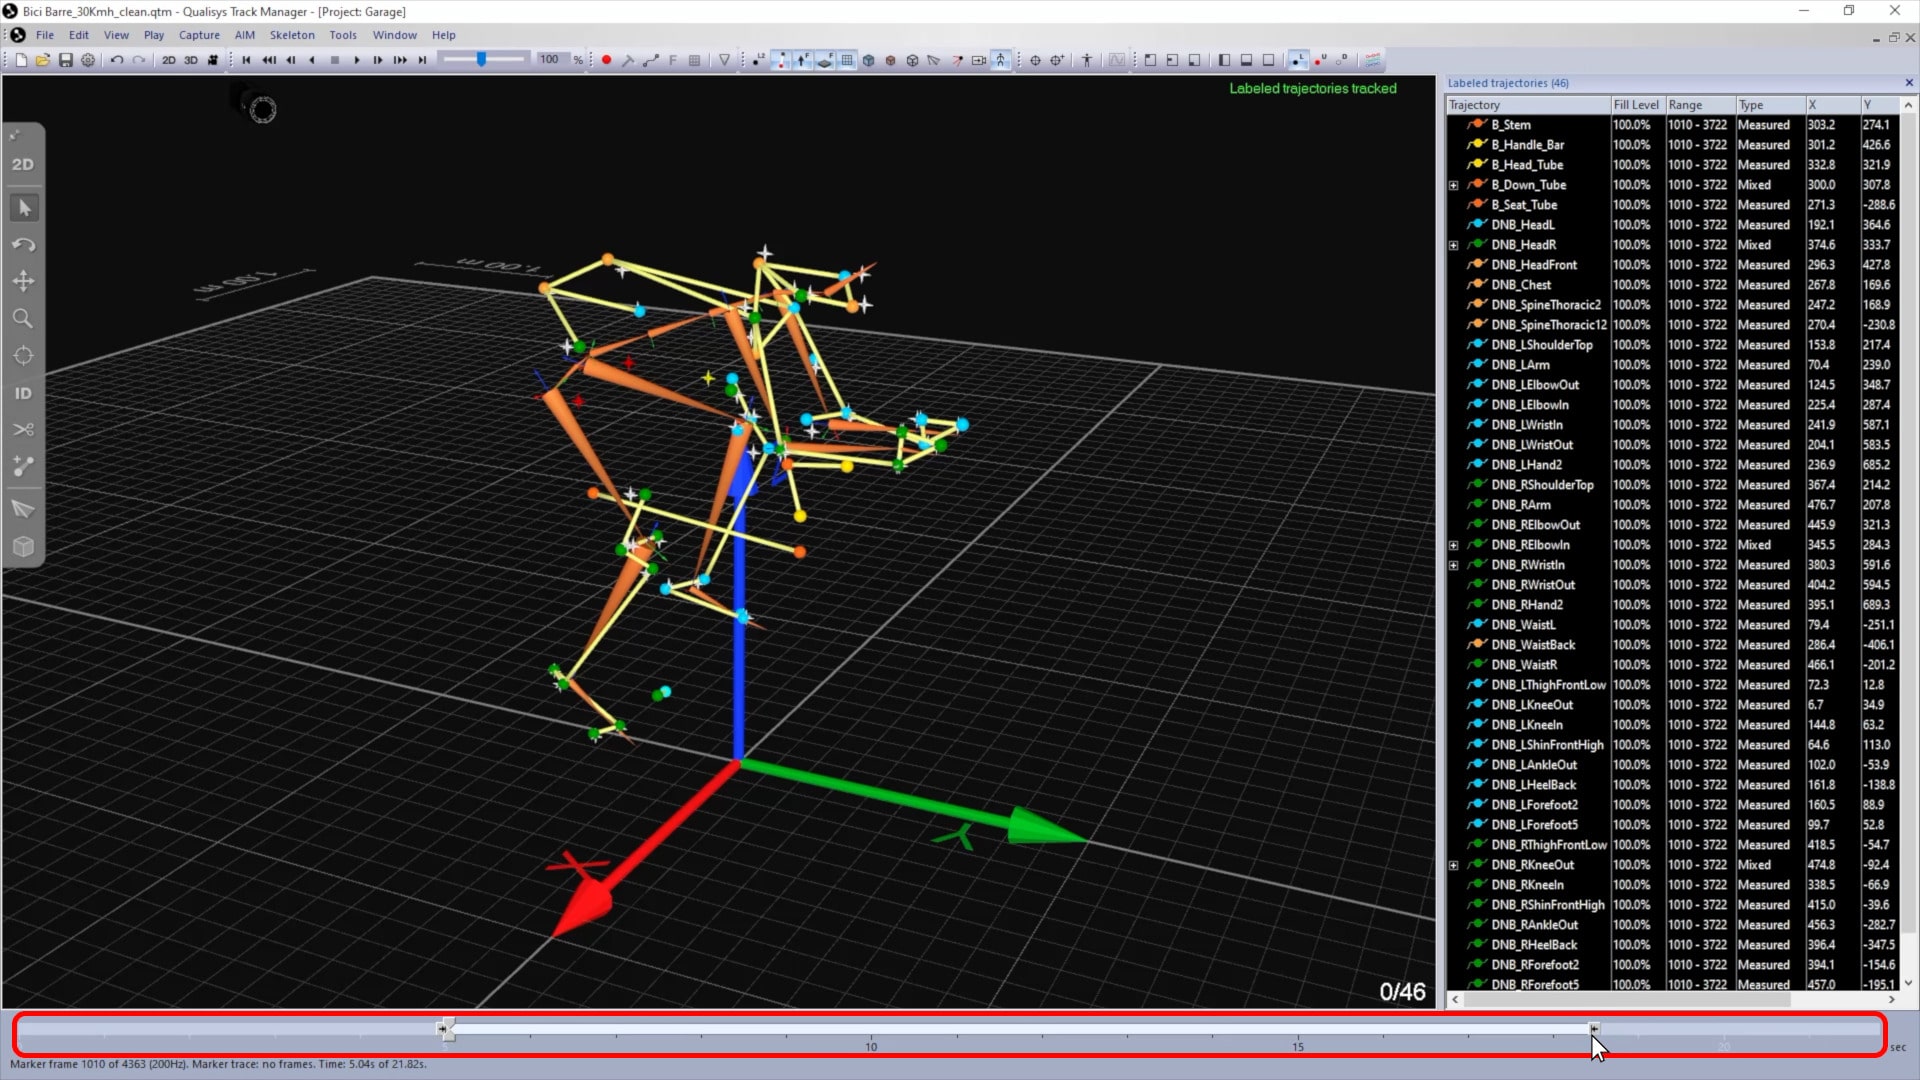
The data range that will be exported is set by the timeline control bar at the bottom of the viewer. By moving the two bottom sliders, you can narrow down the part of the capture that QTM will process.
To export a file that you have open in QTM:
-
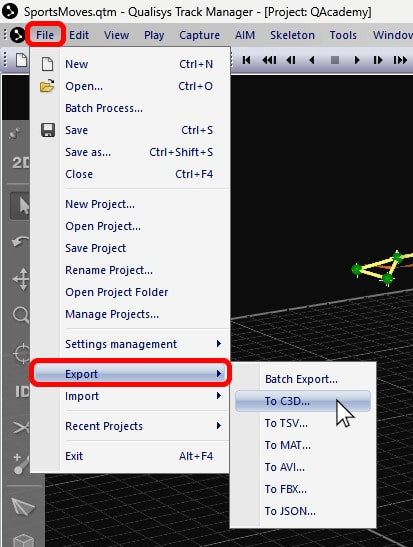
Click “File” in the top menu bar, select “Export,” and choose a format.
-
Select the relevant export settings, and click “OK.”

-
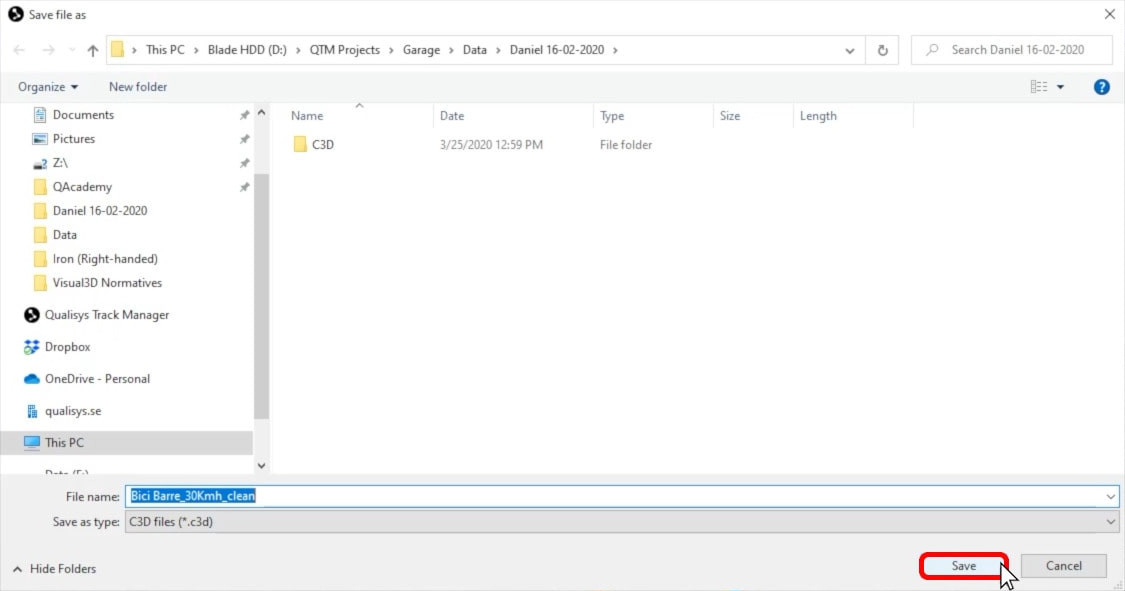
Choose a save location, rename the file if desired, and click “Save.”
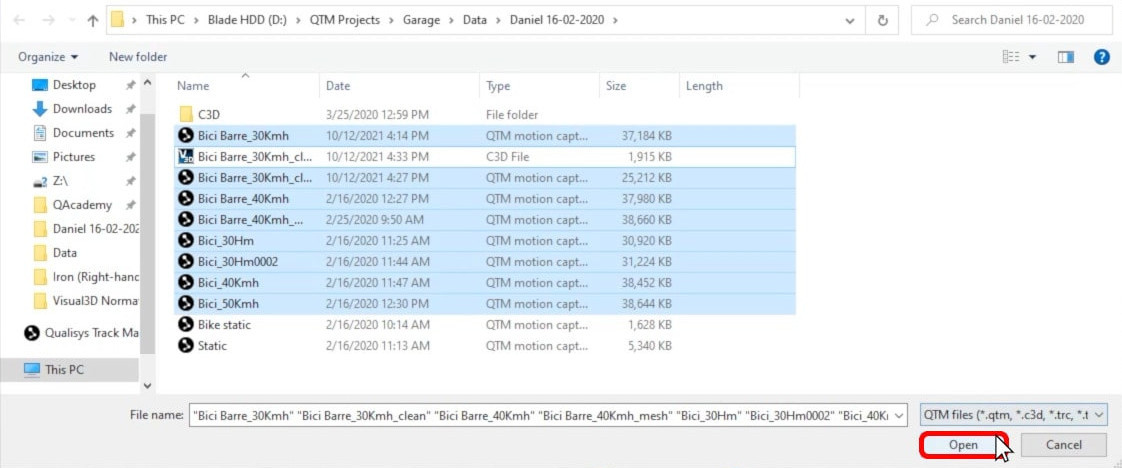
To export a batch of files simultaneously:
-
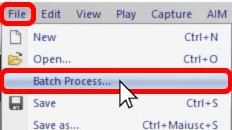
Click “File” and then “Batch process,” or select “Batch process” from the “Export” menu.
-
Hold down the Ctrl or Shift key while selecting the files to be exported, and then click “Open.”
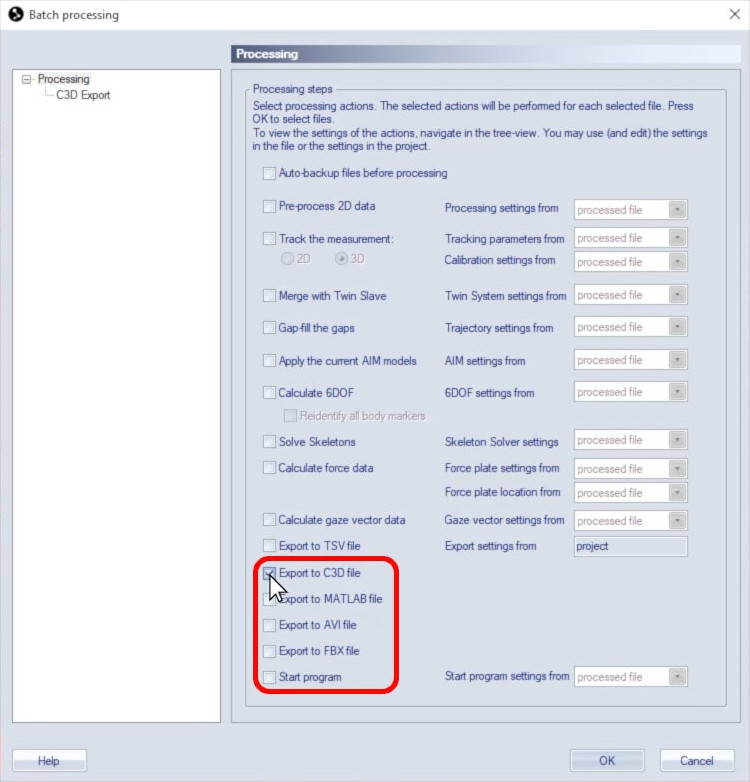
-
In the Processing Steps window, deselect any unwanted actions, choose an export format, and click “OK.”
To set up automatic exports of captured data:
-
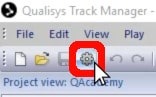
Open Project Options by clicking the gear icon in the top toolbar or by typing keyboard shortcut Ctrl+W.
-
Navigate to “Processing.”

-
In the column under capture actions, select a file format for your exports and click “OK.”
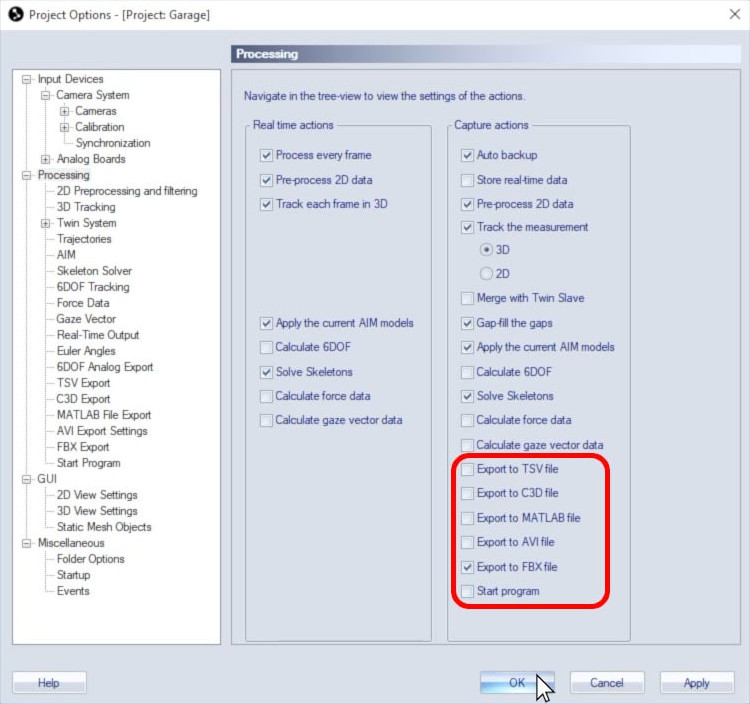
From now on, at the end of every motion capture recording, QTM will automatically export the file to the format you specified. When exporting a batch of files or automatically exporting, QTM will refer to the settings in Project Options for that specific file type.