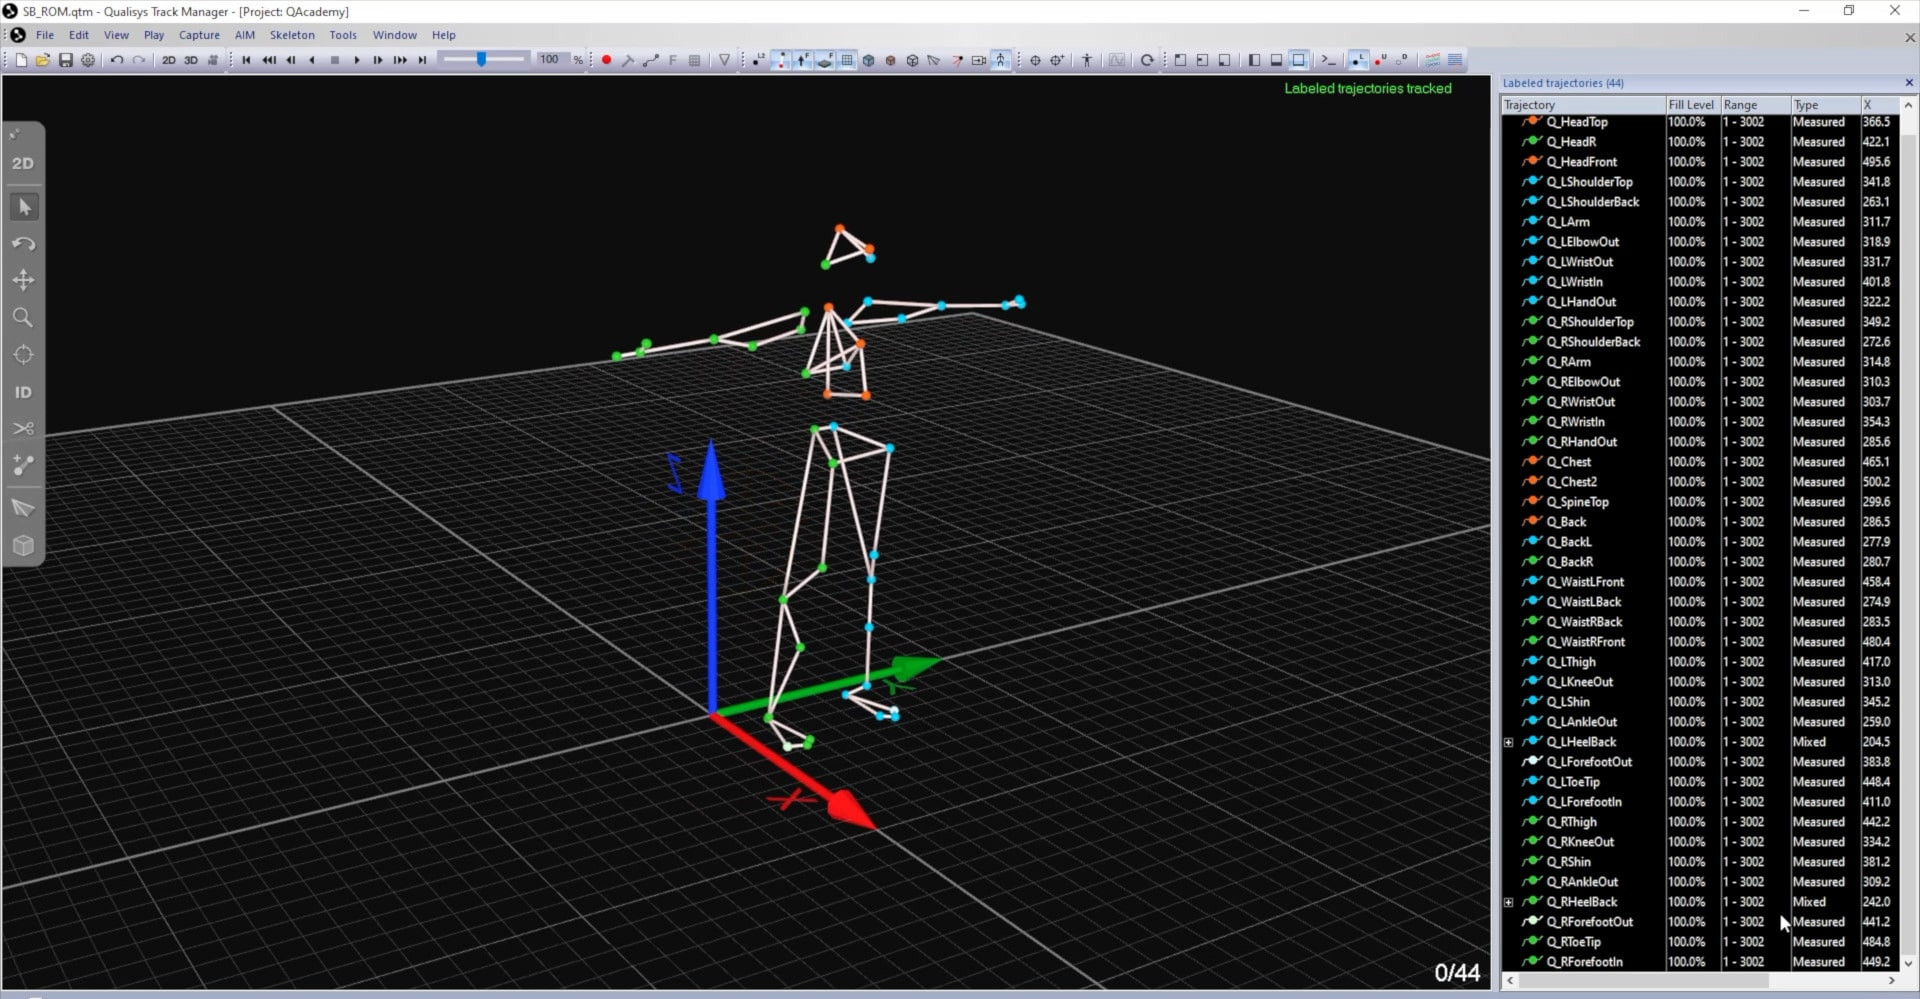
Label list appearance
Before saving your custom label list, you may want to edit its appearance in the 3D viewer. The colors and connections that you set will automatically apply to markers labeled with this list in the future.
Changing marker colors
Right-click on a marker or a selection of markers and select "Change trajectory color" to pick a new one.
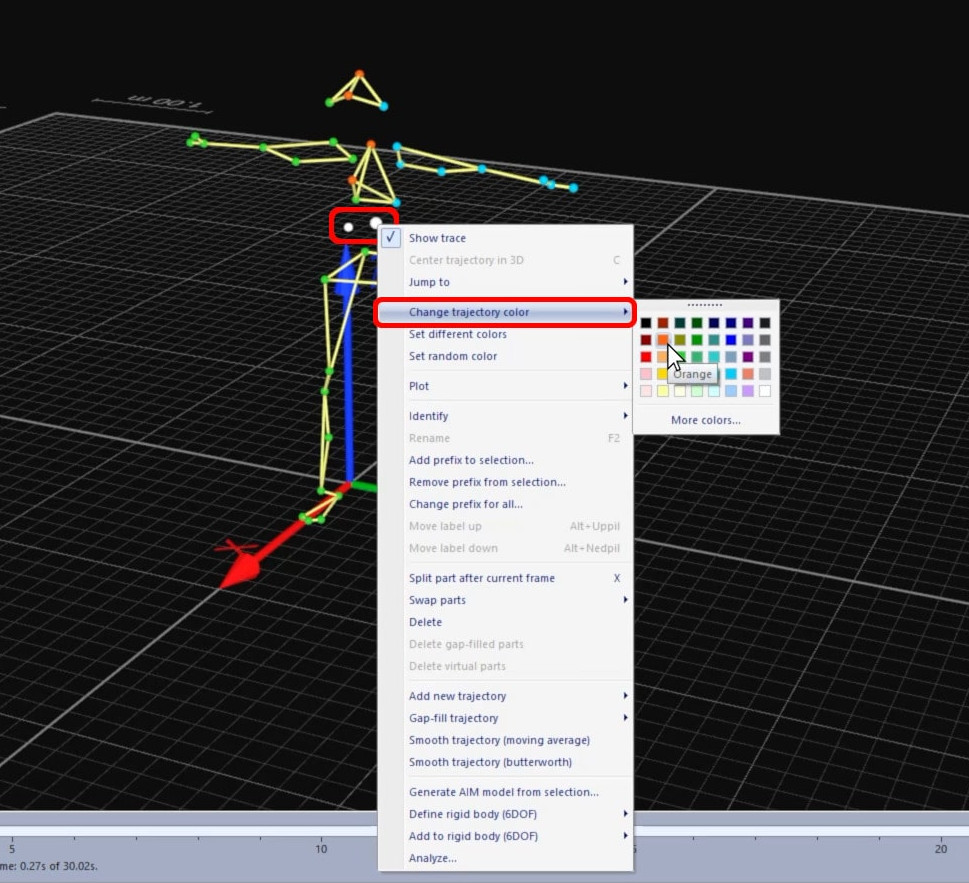
A helpful tip for markers that are easily mixed up is to make them different colors—for example, setting the FootOut marker as lighter than the FootIn one.

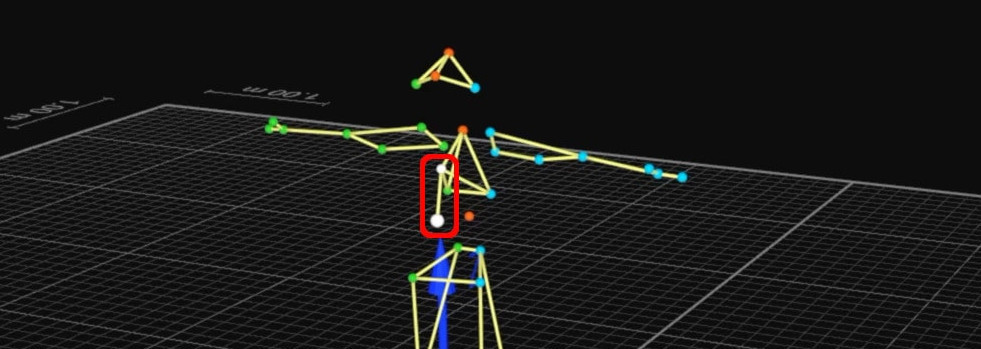
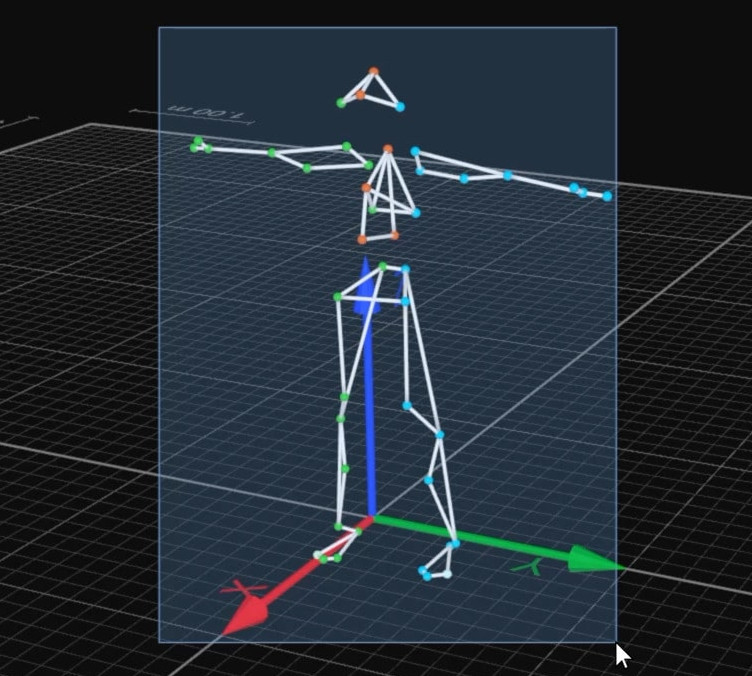
Adding bones
With two markers selected (hold down Ctrl to select multiple items), you can type B to draw a connecting line between them.
Activating the Bone tool lets you easily draw a sequence of connections.
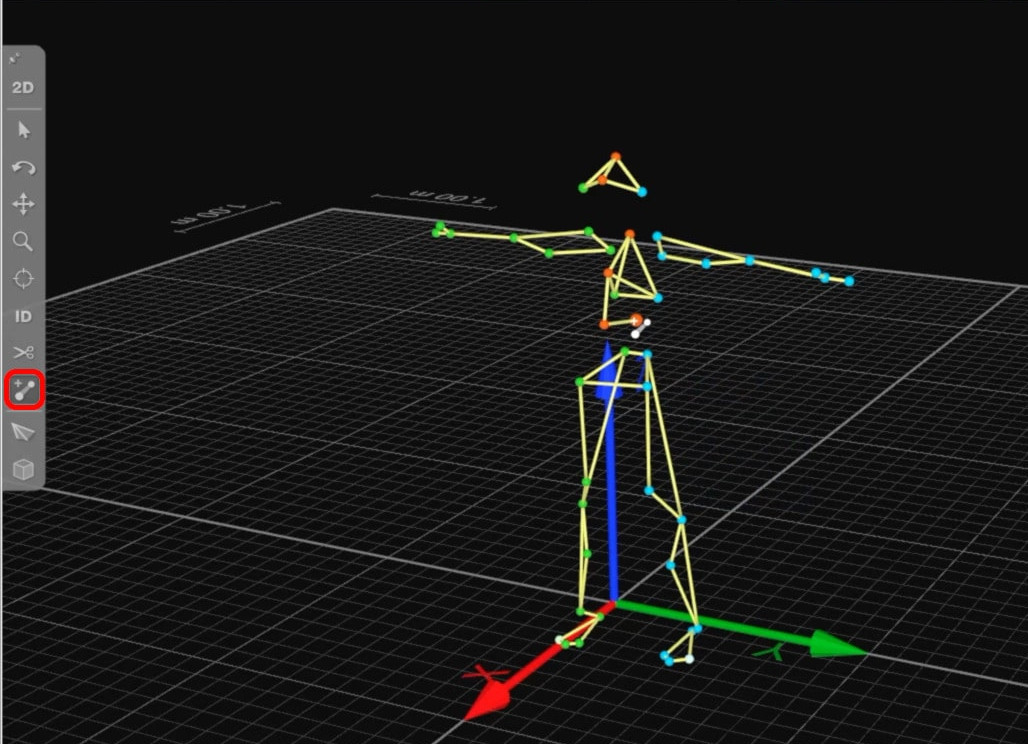
If you place a bone by mistake, you can type Ctrl+Z to undo, or right-click on the bone and select “Delete bone.”

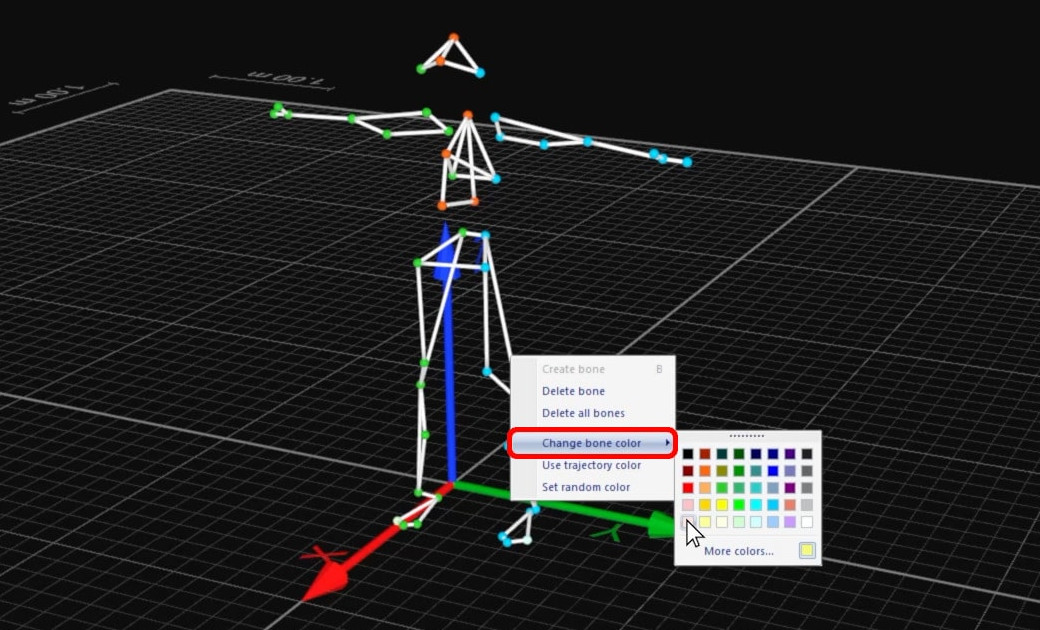
Changing bone colors
Right-clicking on a bone gives you the option to change its color.
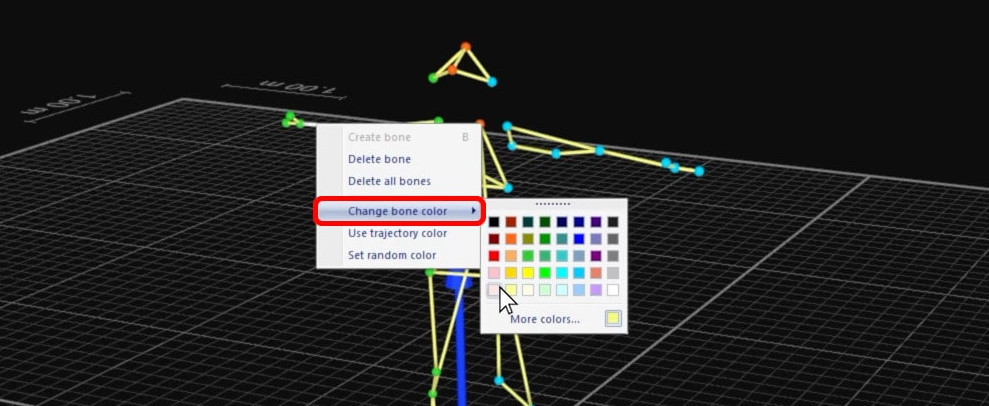
To change the color of all the bones at once, select a single one, then press the Shift key while drawing a box around the whole structure to select them.
Then, right-click on any of them, and select “Change bone color.”
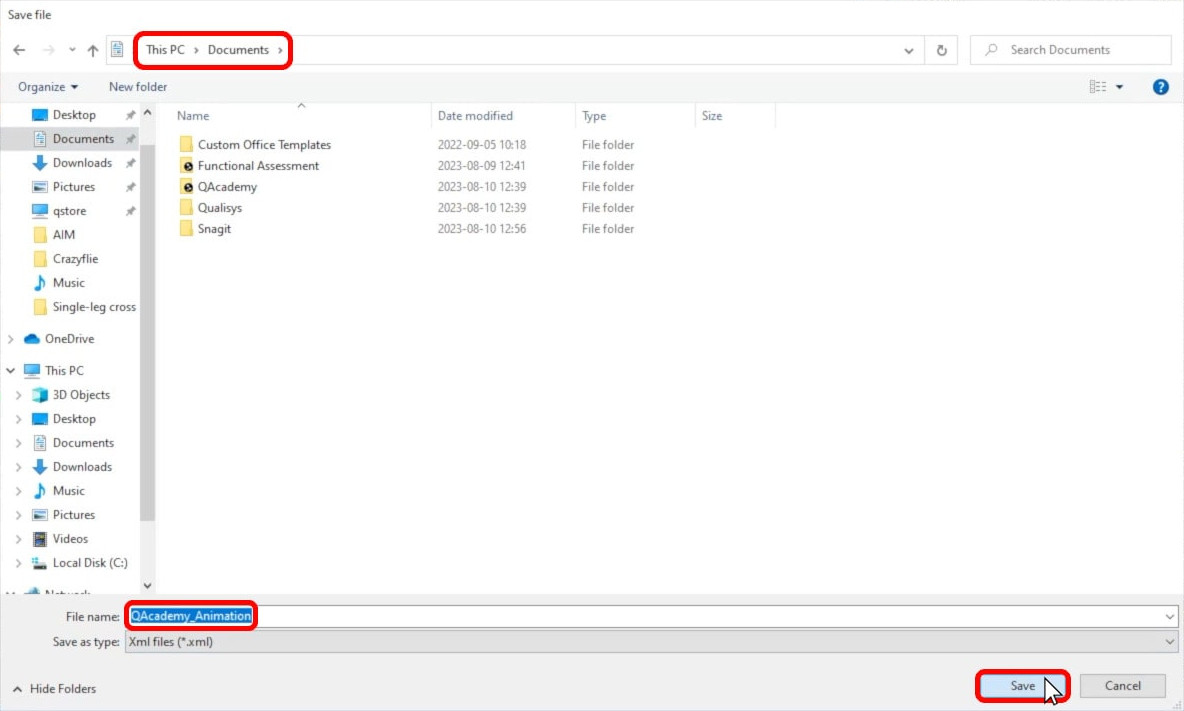
Saving the label list
Once you are satisfied with the appearance of your template, right-click on “Trajectory,” and select “Save label list.”
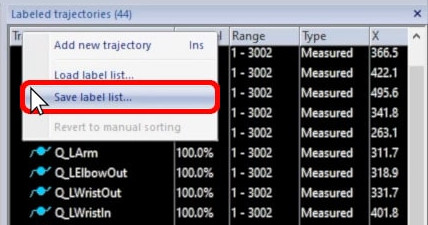
Name the list, and save it in a location that can be easily accessed by other projects or users.
This label list can be used from now on to easily identify and visualize the markers from your custom marker set.