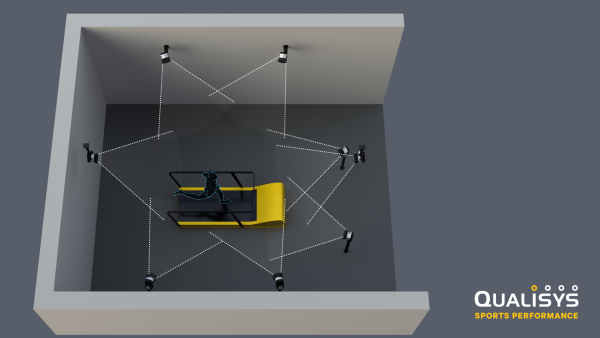
We recommend a room size of approximately 5 x 6 m (minimum 4 x 4 m) and height of at least 2.8 m for the running analysis, with the treadmill located in the center of the room. Other room sizes can also be used but may require different lens types on some or all of the cameras - please contact Qualisys.
Floor and wall coverings should have a matte finish and be non-reflective. Each camera requires a fixed, rigid mounting, usually using a wall bracket that is supplied with each camera.
We recommend that you discuss camera placement, cabling and other building requirements with Qualisys prior to setting up the system.
The standard setup consists of 9 Miqus M3 cameras, 6-7 mounted at a height of approximately 2.6-3 m along each side of the treadmill and the remaining cameras placed lower and towards the front of the runner.
In addition, the standard setup includes two Miqus Video Color cameras. They look similar to the marker cameras but have a different type of LED lights and no IR filter in front of the lens. Typically, one video camera is placed in front of the runner and one to the side.
If only 5 cameras are available, it is still possible to do the analysis. In this case use marker set with clusters and create session called 'Running - Clusters'. Details about marker set and reporting are discussed later.
The camera connections are set up during installation and the cameras remain permanently connected to the computer. Details about the connection can be found in the QTM user manual in the section Making a measurement > Connection of the camera system.
We recommend that the power supply to the cameras is accessible or that the power sockets can be turned on and off with a switch.
For more details about these settings, please refer to the QTM manual. The following are the default values for the Running Analysis:
To ensure optimal operation of the automatic labeling of markers (AIM), Qualisys recommends the following settings in Project Options > Processing > 3D Tracking:
In Project Options > Processing > Trajectories:
On Project Options > Processing > 3D Tracking:
Typically, one Miqus Video Color camera is placed in front of the runner and one to the side.
Recommended settings are:
If the image is too dark or too bright, it may be adjusted:
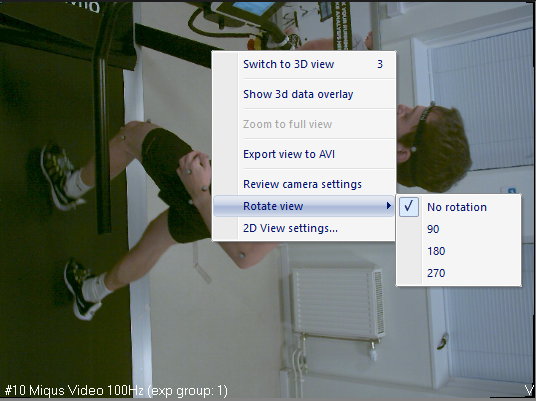
In small rooms, it can be beneficial to rotate the video camera 90 degrees. To adjust how the video is displayed, start preview in QTM, switch to 2D data and right-click the video camera view to adjust the orientation:
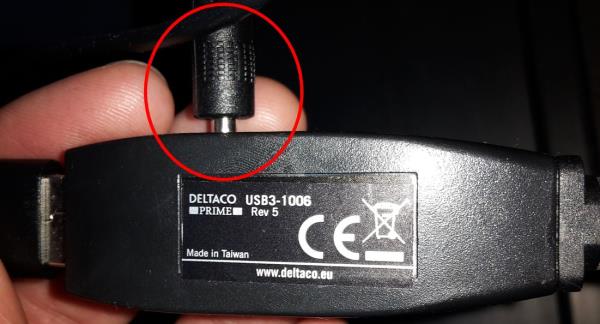
Each video camera (USB web cam) can be connected to the computer with a USB extension.
Important: you must use the active USB extension that is provided by Qualisys (Deltaco USB3-1006 Rev 5). Make sure the power supply that is included with the extension is attached to the end of the extension and to a power outlet. Otherwise the web cam may not receive sufficient power.
Follow these steps to set up the cameras correctly:
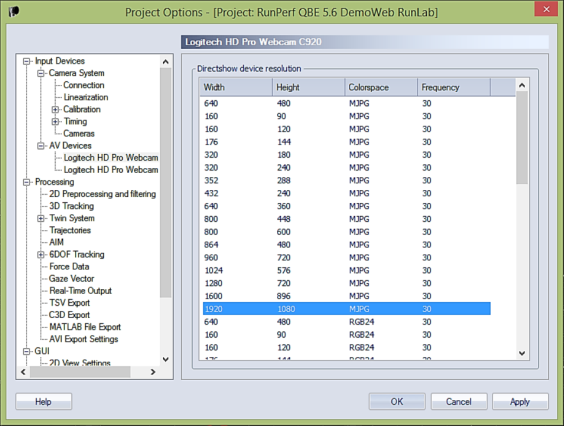
Now the settings for the web cams are available in the AV Devices section. Select each the first webcam (AV Devices > Logitech HD Pro Webcam) and select the line 1920 - 1080 - MJPG - 30 Hz:
Note: do not use QTM to apply additional compression codecs to the webcam video (via right-click on video preview).
Each video camera (DV camera) is connected to a separate Blackmagic card on the computer via an HDMI cable.
Please refer to the QTM manual for the detailed camera settings. The standard resolution is 720p at 59.94 Hz. Demo mode and face detection need to be turned off.
In QTM, right-click the video view and set the Video format to HD 720p 59.94. Right-click again, select Choose Video Compressor and set it to ffdshow view encoder. Set up ffdshow as explained in the QTM manual in the chapter "FFDS-MJPEG codec settings".
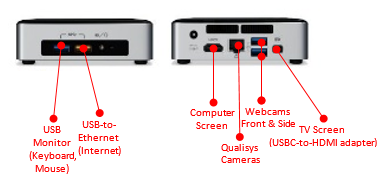
Usually the Running Performance analysis is delivered as a complete package with computer, hardware and connection cables. The TV screen is not included as it depends on available space. The USB Webcams shown in the following figures are for legacy setups only - as of 2018, the standard setup uses Miqus Video Color cameras for reference video.
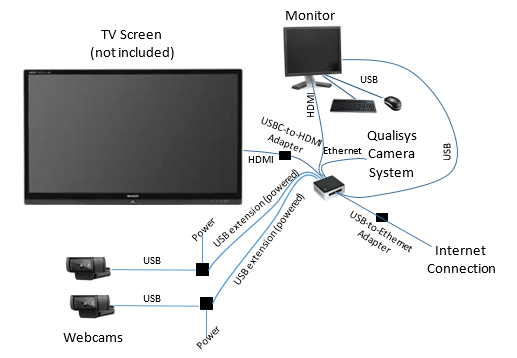
The following figures show the connection on the NUC in detail:
When system setup is complete, we recommend that you make a backup of all settings in QTM with File > Settings management > Backup and restore. In case of difficulties you can load this backup.