PAF Project view
The project view in a PAF project consists of three parts:
-
The Project data tree shows all files that are part of the project (i.e. files contained in the Data subfolder of the project root folder).
You can use the buttons at the bottom of the project tree:
-
Add
Add new subjects, sessions, other types as defined in the PAF settings.
-
Open
Open the selected file.
-
Find
Search files or folders within the PAF project.
-
Find next
Search for the next occurrence of the current search term.
-
-
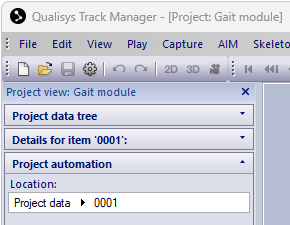
The Details area allows editing the properties of the selected item (for example personal data, session details, file details).
-
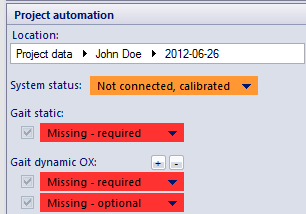
The Project automation area shows contents depending on the selected item. If the selected item is a session, this area shows buttons that correspond to files and the Go button for data collection.
At the top of the Project automation area there is a breadcrumb trail to navigate back to the session, subject or root level.
When a session has been selected, colored buttons appear in the Project automation area:
-
There are three methods to collect files:
-
Click a red field and select Capture.
-
Click a red field, select Edit Settings and Capture. Changes to the duration of the measurement period will be stored and be used the next time you make a measurement of the same type.
-
Click the Go button. If you click the Go button, QTM starts at the top of the file list and records all files of the first measurement type (for example static). If you click again, it continues with all measurements of the second measurement type (for example). Activate the external trigger button in Project Options > Timing and use it to control when the captures start. At any point, click the Esc key to stop the data collection.
-
-
The following options are available for a recorded file:

-
Add comments by clicking the field next to the green file name.
-
Use the plus/minus button to show more/less file buttons (to make additional captures).
-
Un-check a file to exclude it from the processing (only checked files will be exported).
-
-
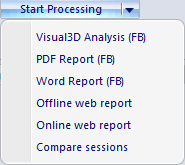
Once the minimum number of files has been recorded, the Start Processing button can be used. Click the button to run the default processing step. Depending on the PAF module, there may be multiple processing steps. Click the triangle on the button to show all processing steps. The default processing step is topmost in the list.

-
Click the Show guide button to show the marker set guide, if available.