Hardware setup and configuration
The Noraxon EMG device should be configured for use with QTM according to the instructions below. For more detailed information, contact Noraxon or Qualisys support.
Add input device
First, you must add the Noraxon EMG device to QTM:
-
In QTM, open the Input Devices page under Project Options.
-
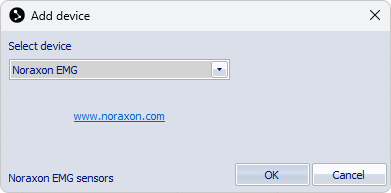
Click the Add Device button and select Noraxon EMG in the drop down menu.
-
Check the Noraxon EMG item in the Input Devices list. The Noraxon EMG device should now show up as an input device under the EMGs category.
Hardware setup
Noraxon Ultium EMG
Hardware connections
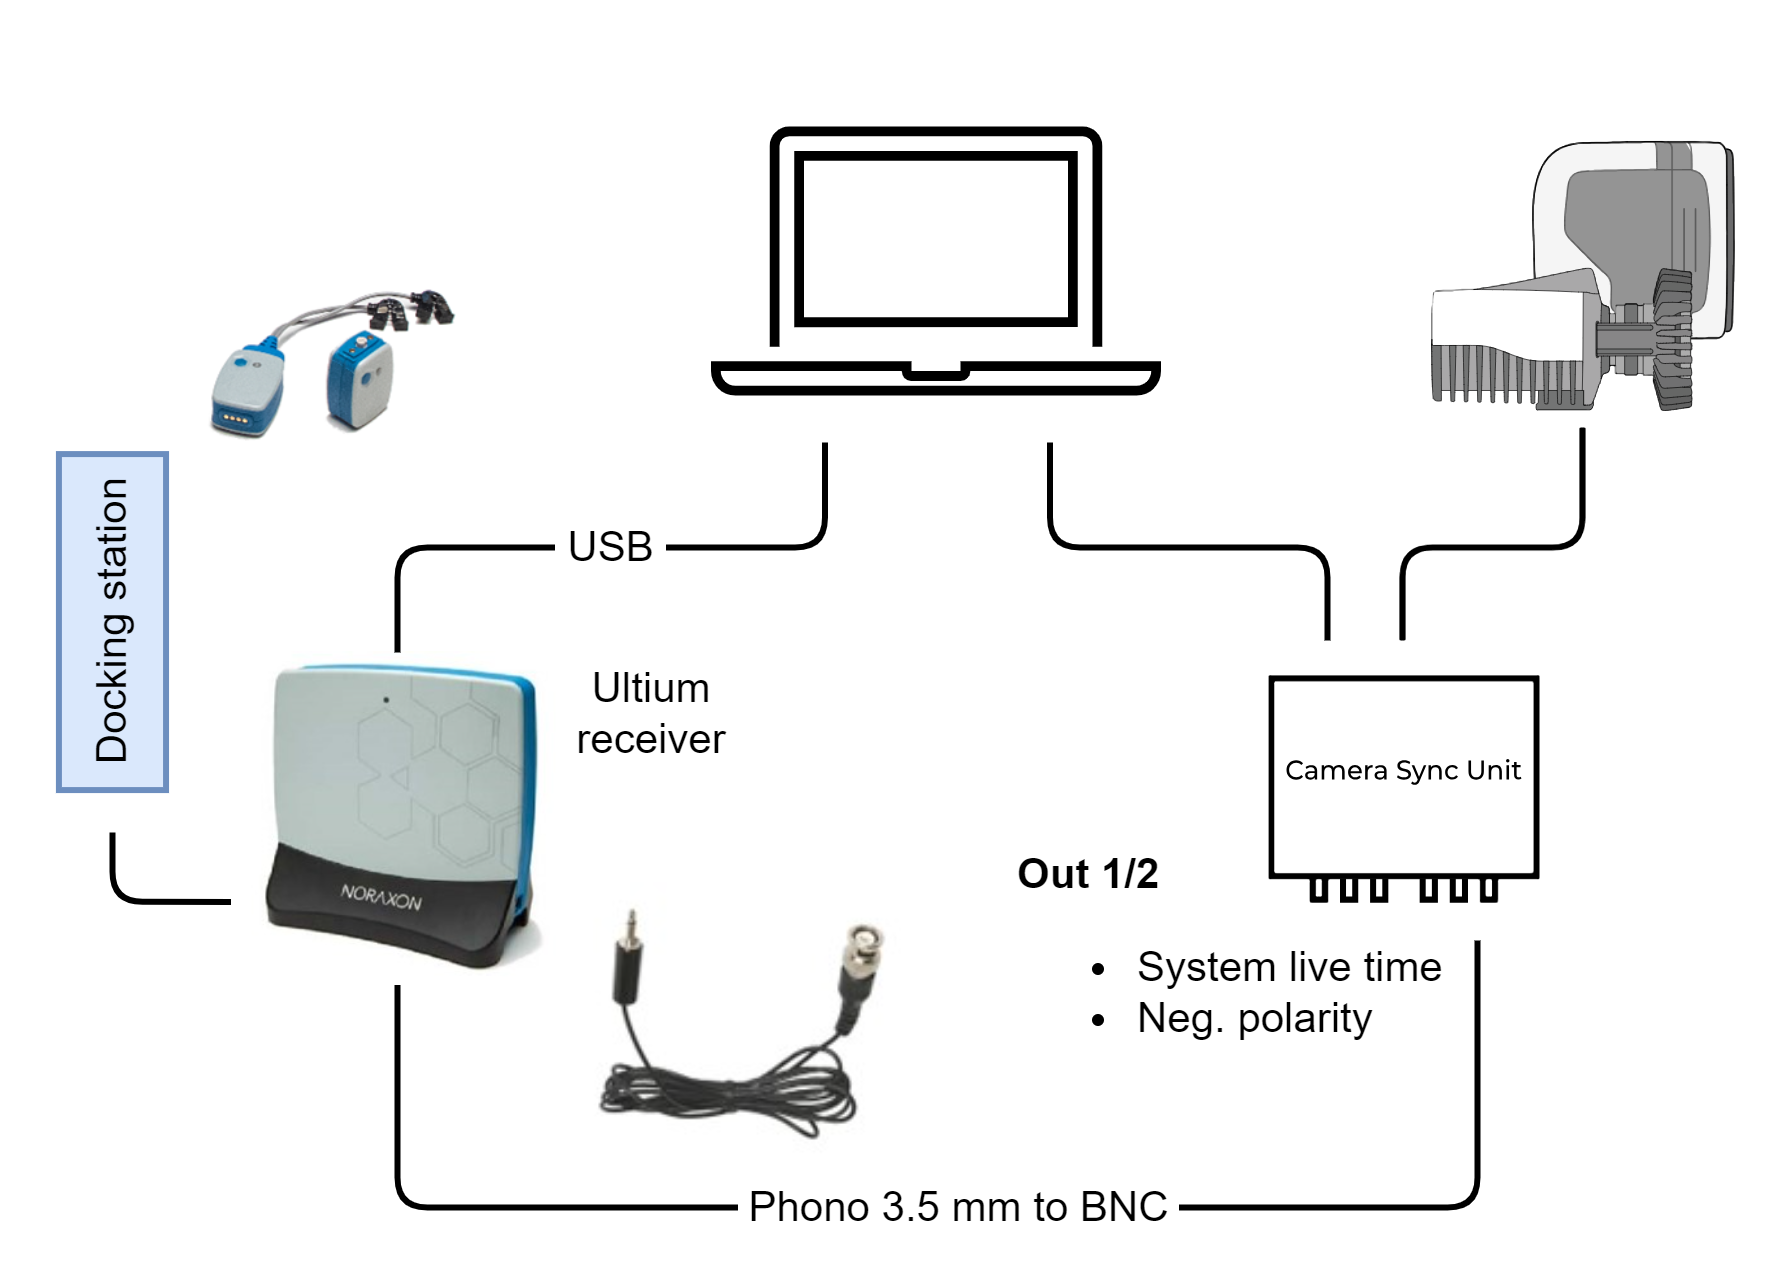
The Noraxon Ultium EMG device is connected as follows:
-
Connect the Noraxon Ultium receiver to the computer via USB.
-
Connect the sensor docking station to the Ultium receiver with the dedicated cable.
-
Connect the Out 1 or Out 2 port of the Qualisys Camera Sync Unit to the Sync input of the Ultium receiver with a phono 3.5 mm to BNC cable. If you are using an Oqus camera as sync device, use the Sync out connector of the Sync/Trigger splitter.
Device and sensor configuration
Follow these steps to setup your Noraxon Ultium EMG device and sensor configuration.
-
Open the Noraxon EMG settings page under Project Options > Input Devices > EMGs.
-
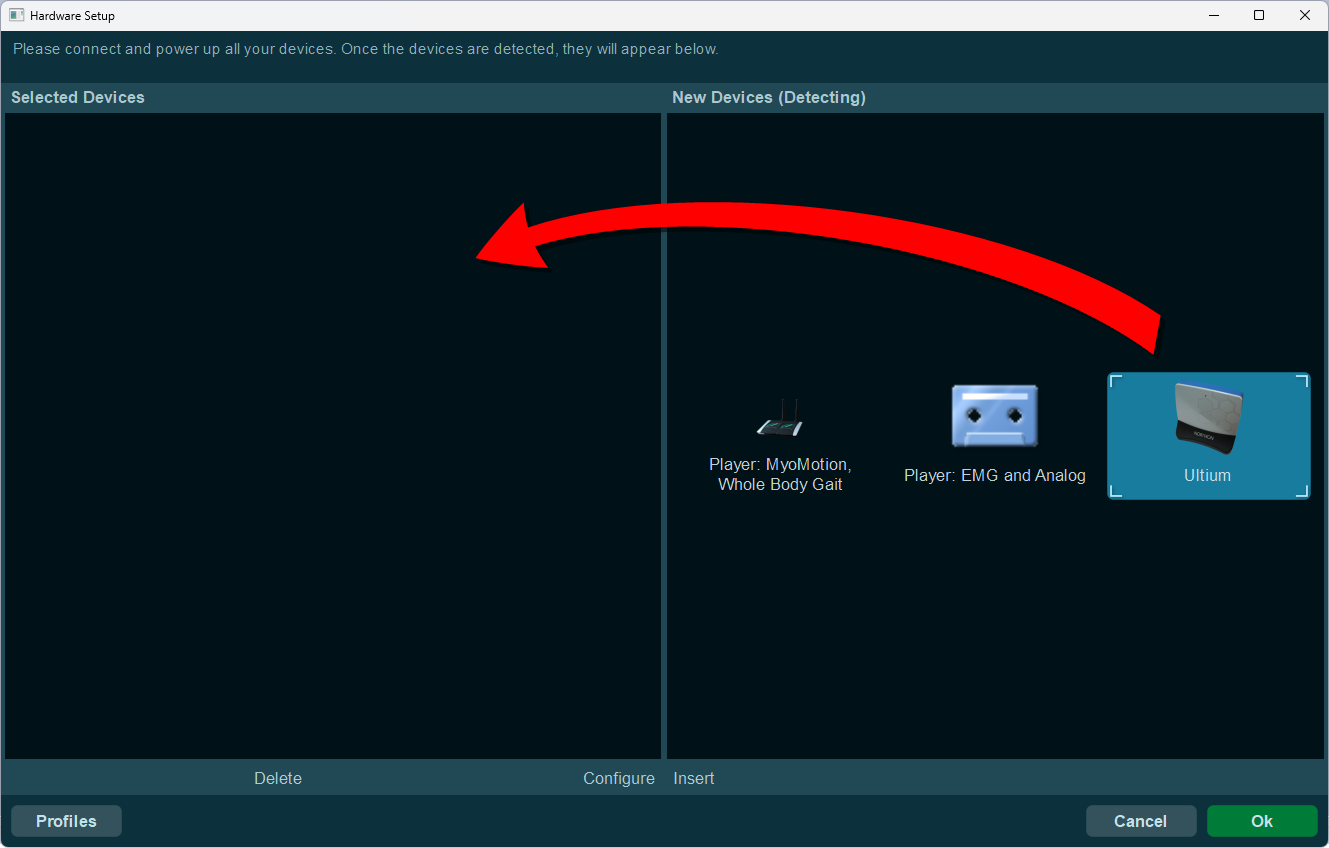
Press the Setup button to open the Noraxon Hardware setup program. The Ultium device should be shown as one of the detected devices.
-
Drag the Ultium device to the Selected Devices tab. This will open the Ultium Setup dialog (if not, double click on the Ultium device).
-
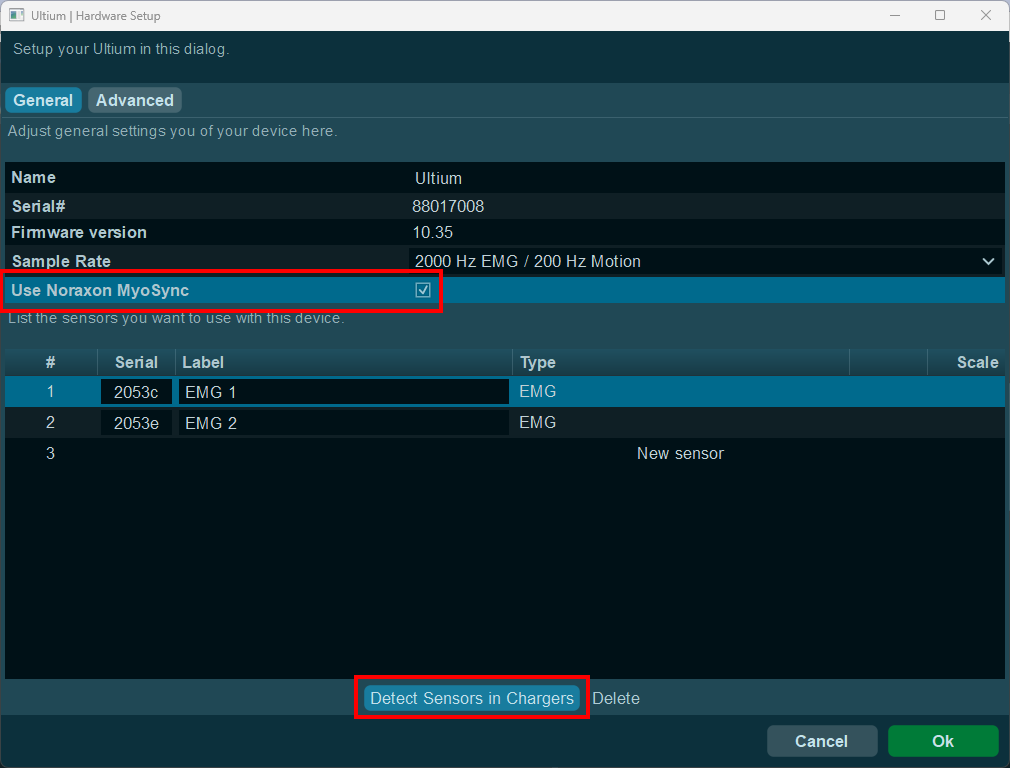
In the Ultium General setup, add your sensors to the configuration. The easiest way is to press the Detect Sensors in Chargers button, making sure that all sensors you want to use are present in the connected sensor docking stations.
When all sensors are listed, you can change the labels. The labels will be used as the channel names in QTM.
Make sure to check the Use Noraxon MyoSync checkbox.
-
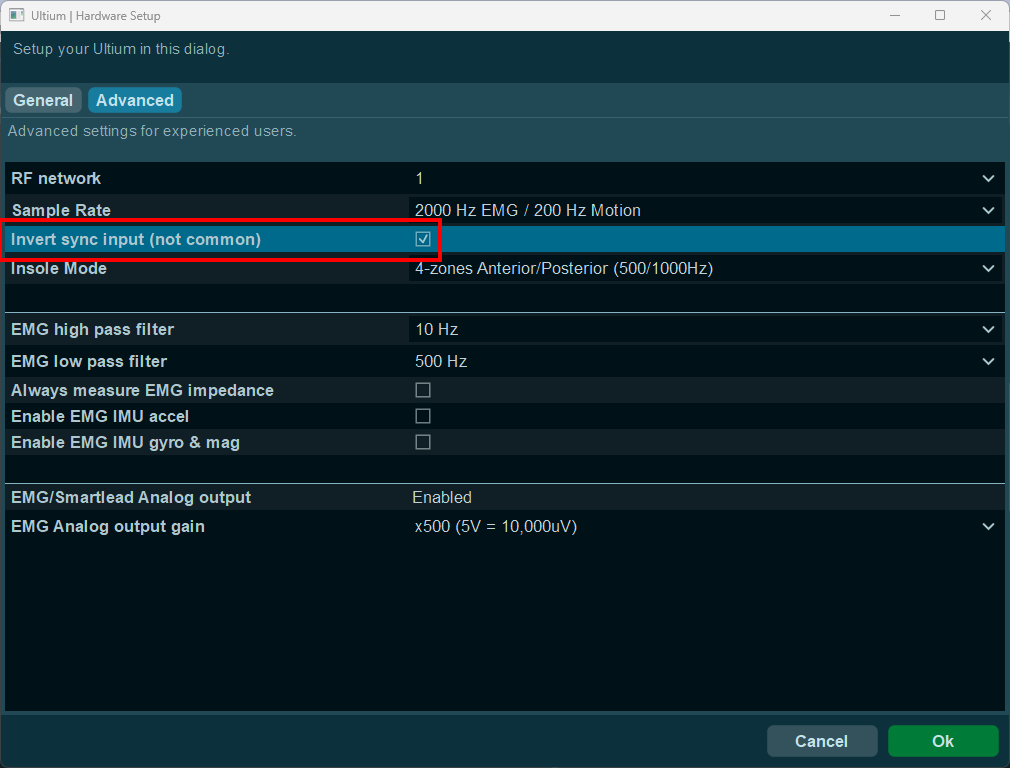
Click the Advanced button to open the Advanced setup dialog.
-
In the Advanced setup page, make sure to check the Invert sync input checkbox.
Optionally, check the Enable EMG IMU accel and/or Enable EMG IMU gyro & mag checkboxes to include auxiliary data from the EMG sensors.
-
Click OK to store the configuration and exit the hardware setup.
Noraxon Dekstop DTS
Hardware connections
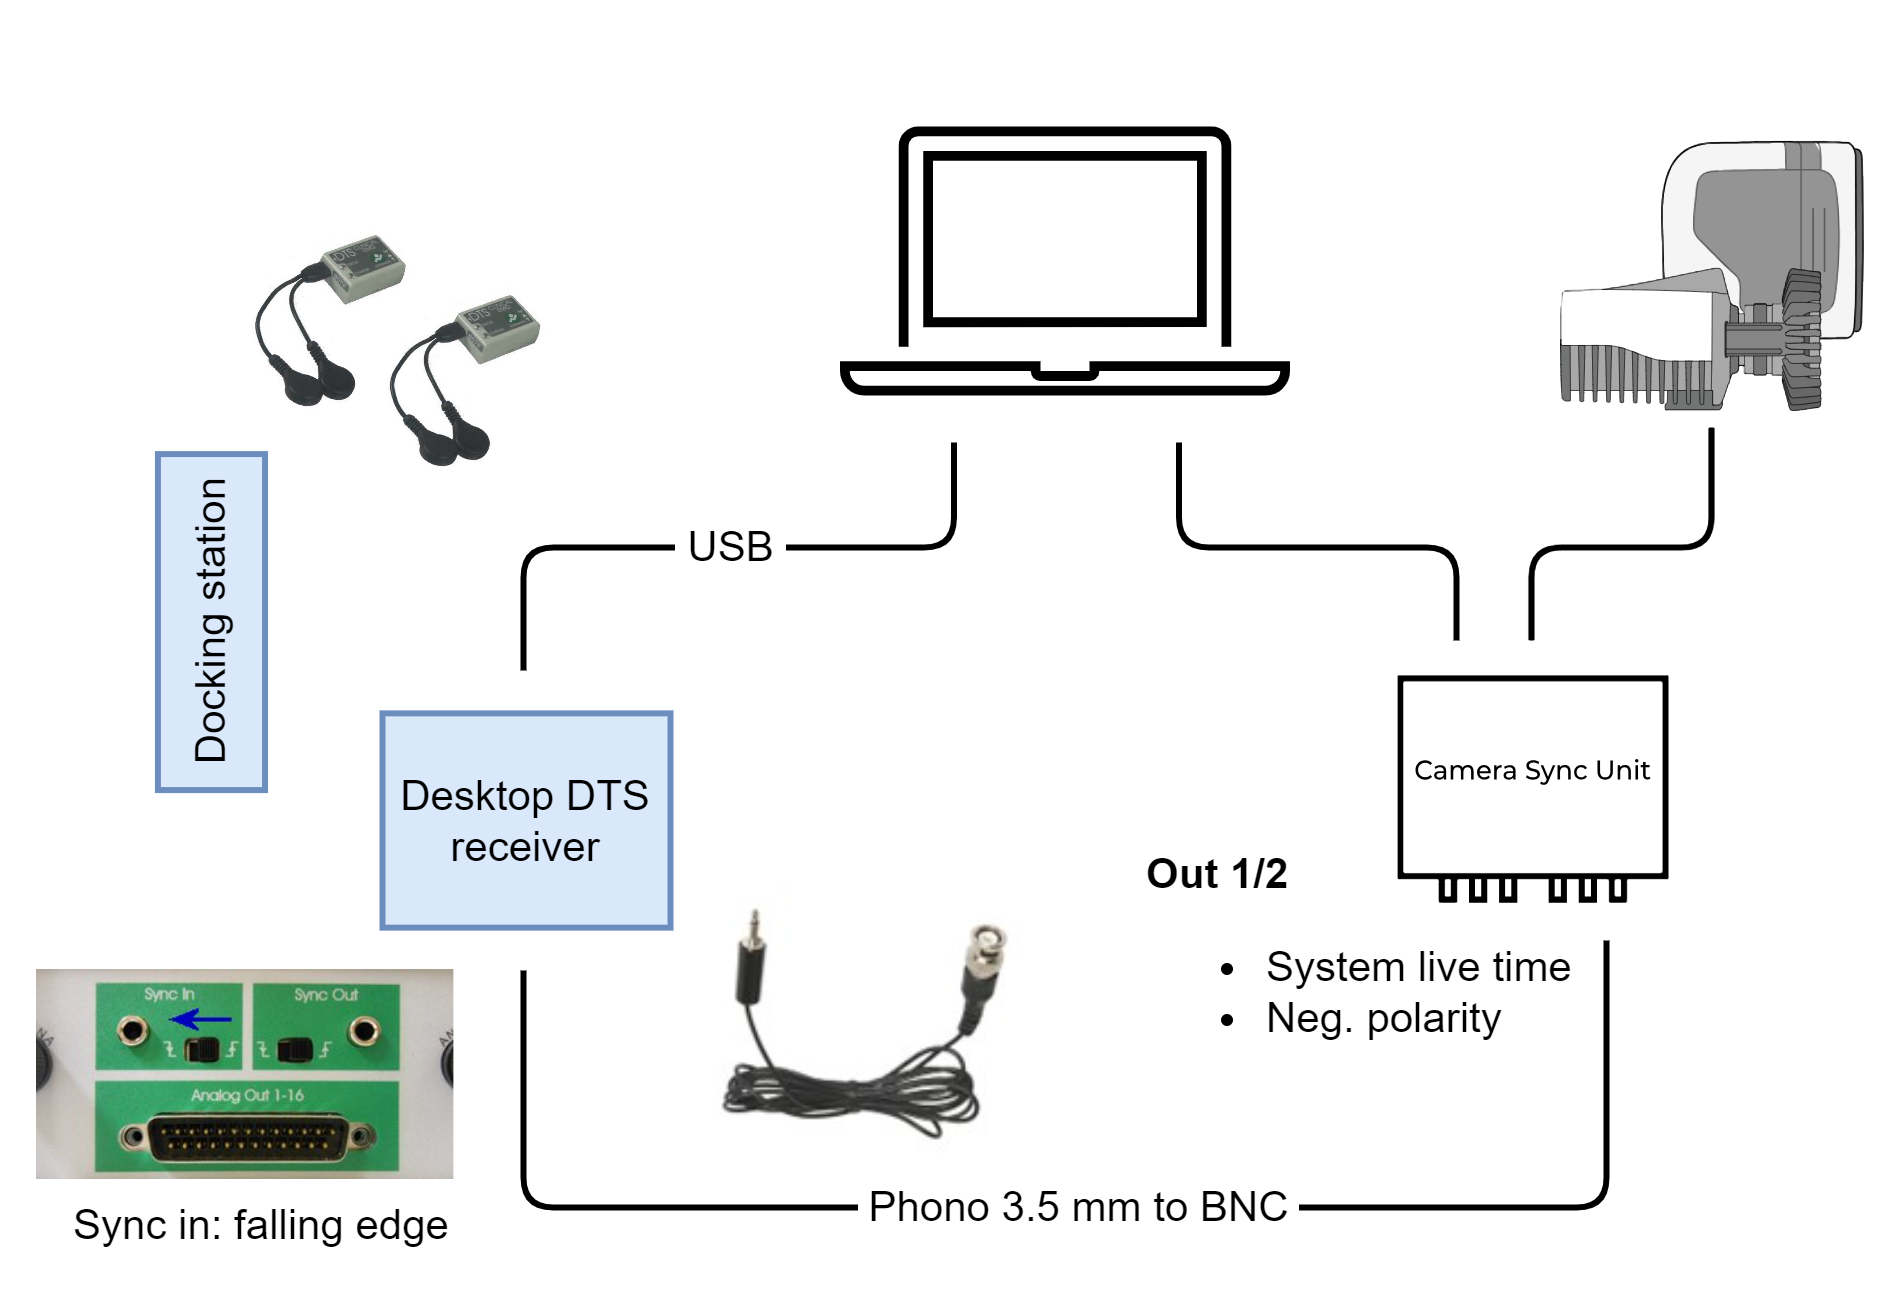
The Noraxon Desktop DTS EMG device is connected as follows:
-
Connect the Noraxon Desktop DTS receiver to the computer via USB.
-
Make sure that the sensors are charged in the sensor docking station.
-
Connect the Out 1 or Out 2 port of the Qualisys Camera Sync Unit to the Sync in input of the Desktop DTS receiver with a phono 3.5 mm to BNC cable. If you are using an Oqus camera as sync device, use the Sync out connector of the Sync/Trigger splitter.
Device and sensor configuration
Follow these steps to setup your Noraxon Desktop DTS device and sensor configuration.
-
Open the Noraxon EMG settings page under Project Options > Input Devices > EMGs.
-
Press the Setup button to open the Noraxon Hardware setup program. The Desktop DTS device should be shown as one of the detected devices.
-
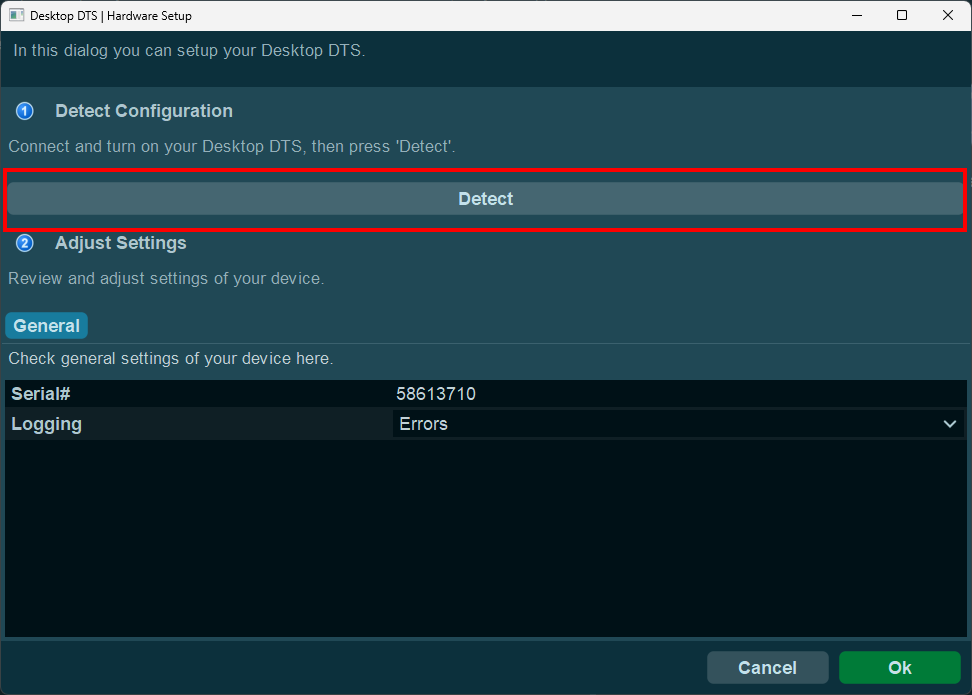
Drag the Desktop DTS device to the Selected Devices tab. This will open the Desktop DTS Hardware Setup page.
-
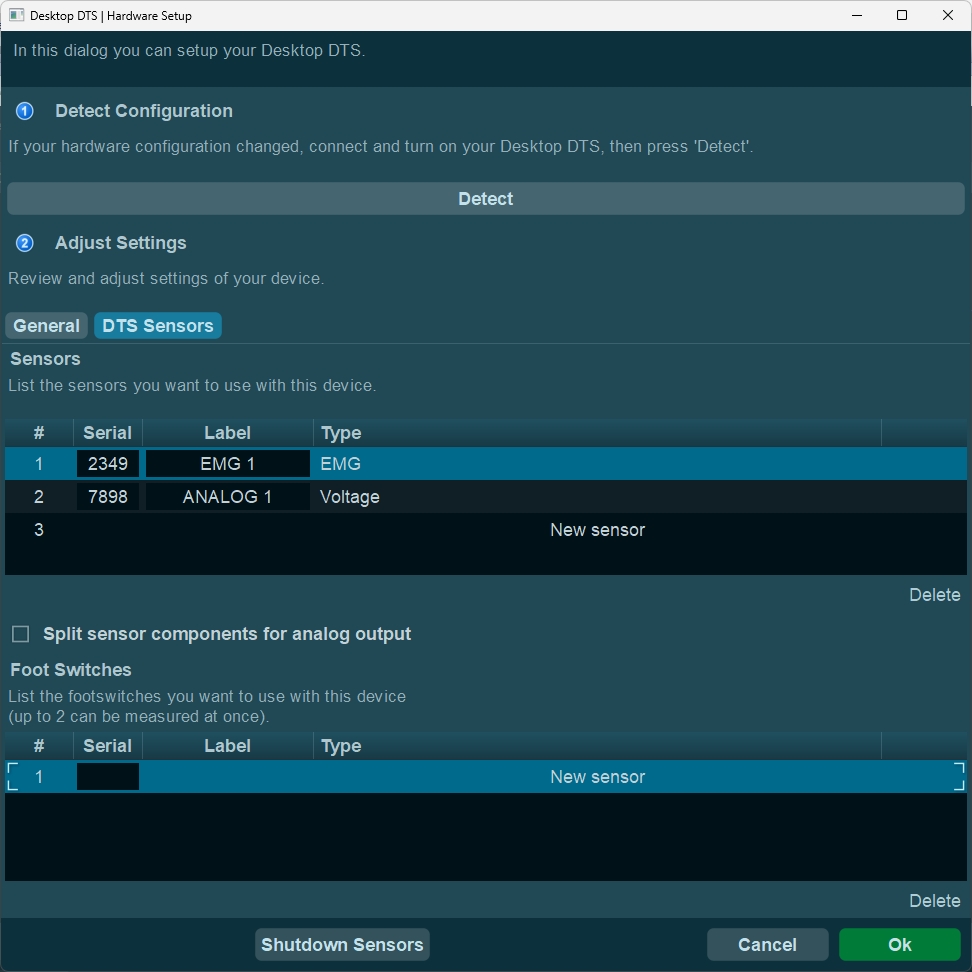
Press the Detect button to detect the configuration of the connected Desktop DTS device. The sensor and foot switch lists should now show up.
-
Add your sensors to the configuration by typing in their serial numbers. You can change the labels, which will be used as the channel names in QTM.
-
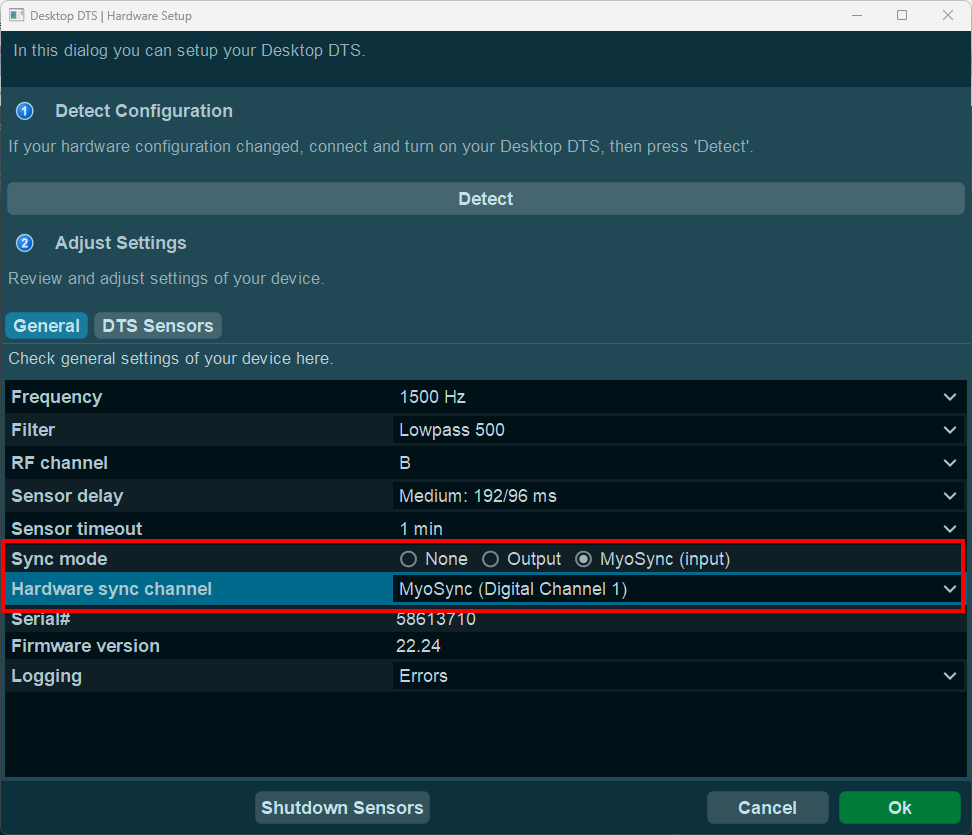
Click the General button to open the General setup dialog.
-
In the General setup page, select the following settings:
-
Sync mode: MyoSync (input)
-
Hardware sync channel: MyoSync(Digital Channel 1)
-
-
Click OK to store the configuration and exit the hardware setup.